Okta with SAML 2.0
- Login to your “OKTA Admin Panel”.
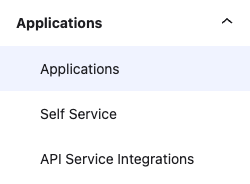
- Select “Applications” from the left menu.
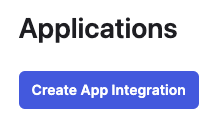
- Click the “Create App Integration” button on the Applications page.
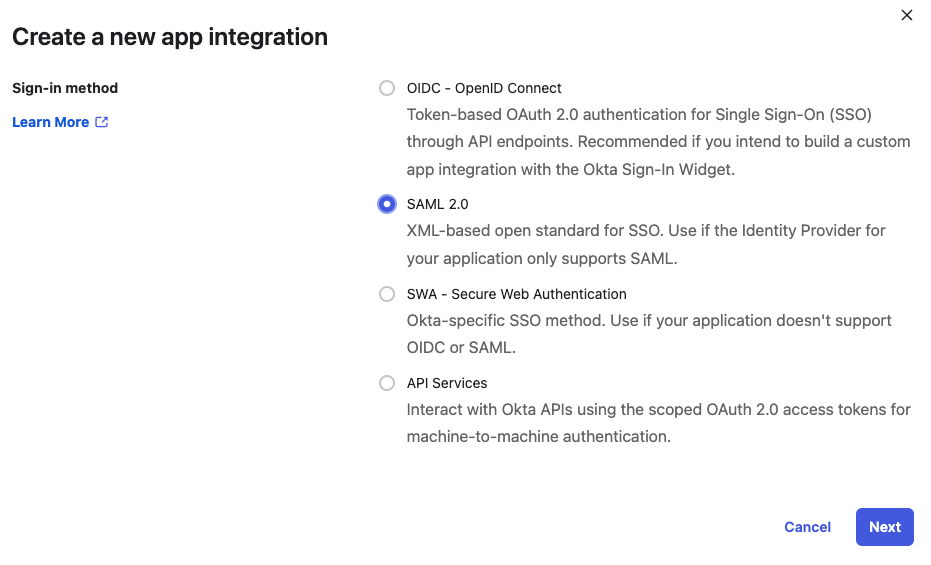
- Select “SAML 2.0” as the “Sign-in method” and click the “Next” button.
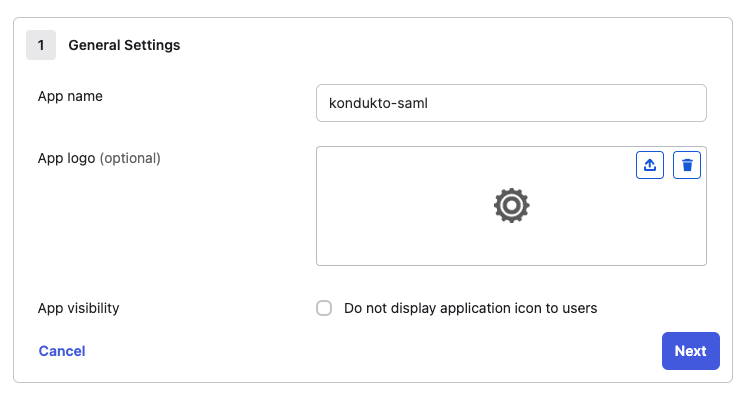
- Fill the application name as “kondukto-saml” and click the “Next” button.
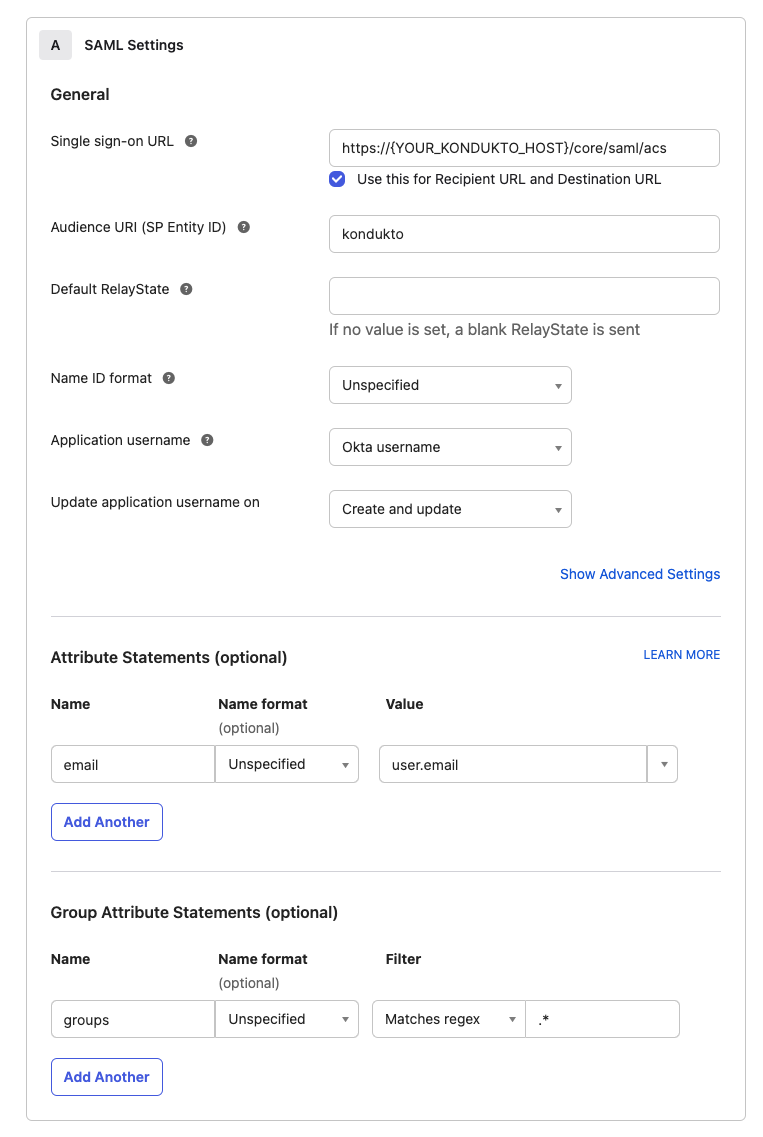
- Fill in the “Single sign-on URL” and “SP Entity ID” fields. Add “email” attribute statement and “groups” group attribute statement. Click the “Next” button.
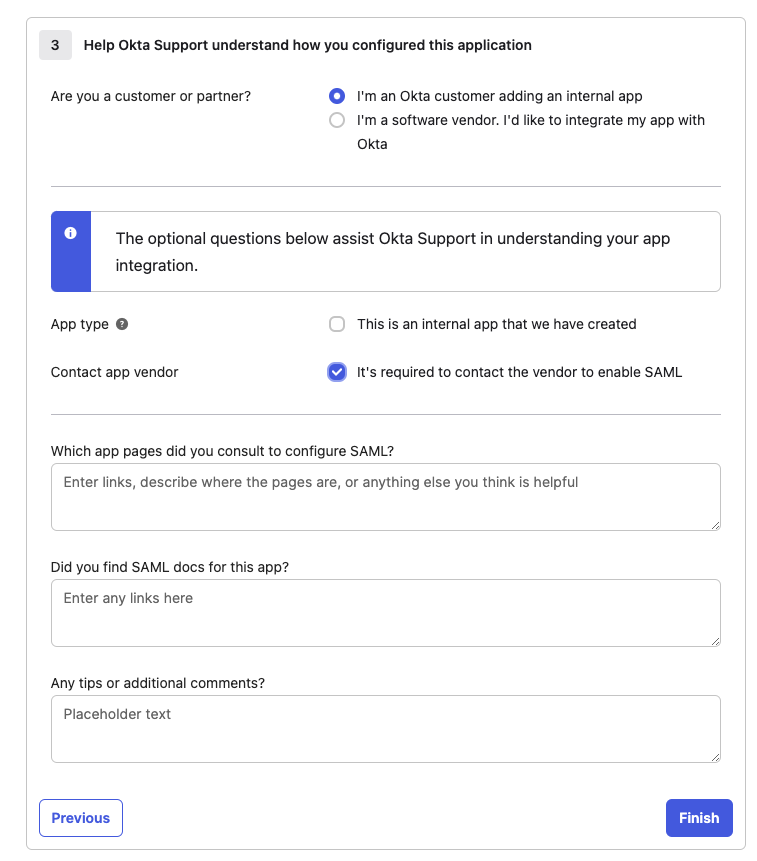
- Fill the “Feedback” information and click the “Finish” button.
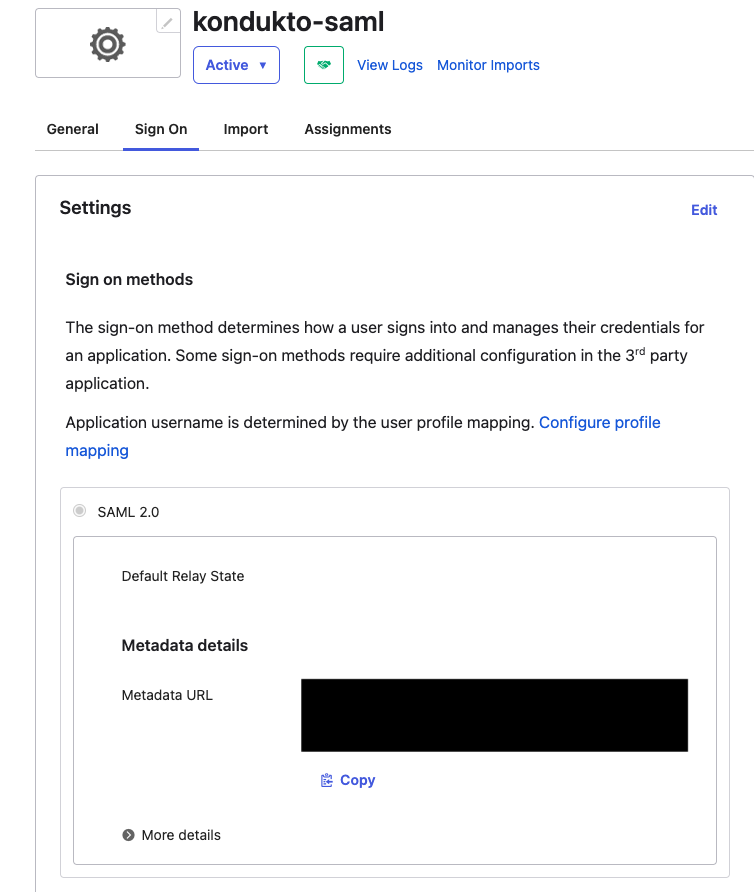
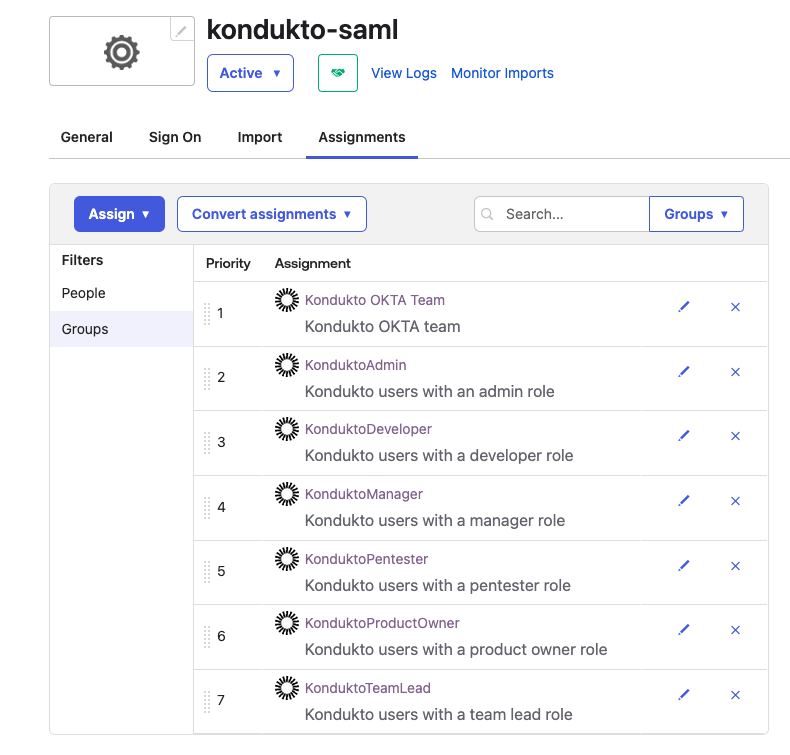
- On the “kondukto-saml” application page, click the “Sign On” tab and click the “More details” accordion to see SAML 2.0 details
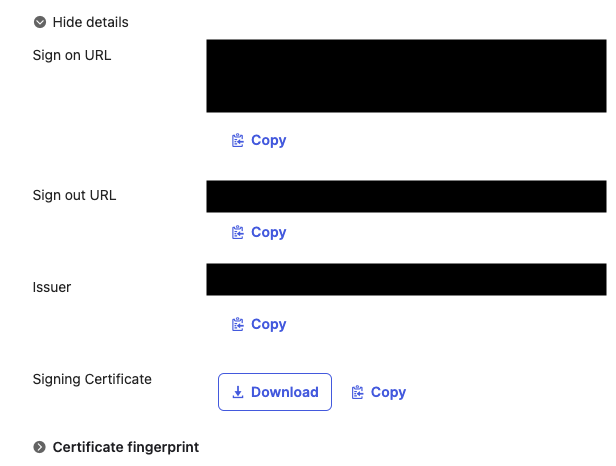
- Copy the “Sign On URL” and “Issuer” fields to the safe place and download the “Signing Certificate” to the safe place.
- Login to your Kondukto application with an admin user.
- Select “Integrations” from the left menu.

- Select “Single Sing-On Tools” on the integrations page.

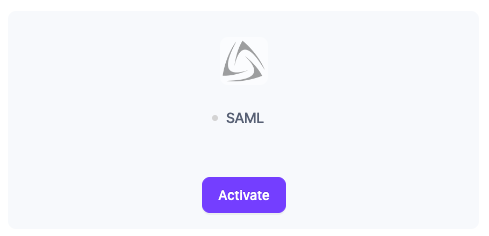
- Activate the “SAML” integration.
-
Fill in the SAML integration fields and click the “Save” button.
-
Base URL: https://{YOUR_KONDUKTO_HOST}/core/saml/acs
-
Sign In URL: The copied “Sign On URL” value in step 9.
-
Entity ID: The copied “Issuer” value in step 9.
-
Entity: kondukto
-
Certificate: The downloaded “Signing Certificate” value in step 9.
-
Admin: The OKTA group name whose members are going to have an admin role in Kondukto
-
Manager: The OKTA group name whose members are going to have a manager role in Kondukto
-
Product Owner: The OKTA group name whose members are going to have a product owner role in Kondukto
-
Team Lead: The OKTA group name whose members are going to have a team lead role in Kondukto
-
Developer: The OKTA group name whose members are going to have a developer role in Kondukto
-
Pentester: The OKTA group name whose members are going to have a pentester role in Kondukto
-
Team Provisioning: If checked, OKTA groups will be created as a team in Kondukto.

- On the “kondukto-saml” application page, click the “Assignments” tab and assign the OKTA groups that are mapped with Kondukto roles in step 14.
- Click the “Login with SAML” button on the Kondukto application login page to log in with a user of the OKTA “kondukto-saml” app.
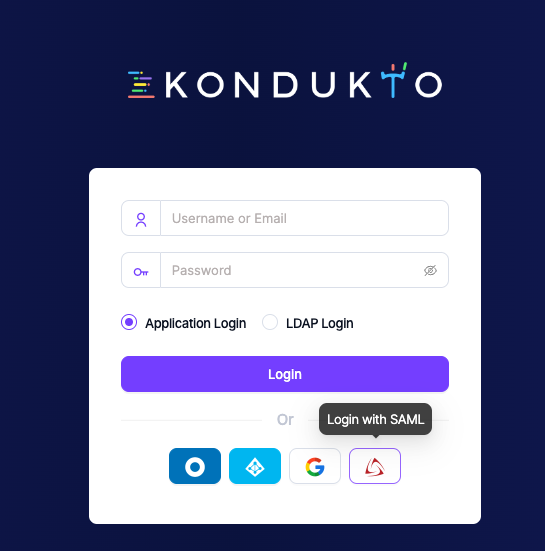
- Login to the OKTA user credentials to log in to the Kondukto application.
