Google SSO Integration
In order to provide seamless and secure access to Kondukto, an option for sign-in using Google Single Sign-On (SSO) has been implemented. This functionality allows users to gain access to our platform utilizing their existing Google credentials, eliminating the need to remember another username and password. This guide is specifically designed to elucidate the procedure of utilizing Google SSO to log in to our platform. All the required steps and guidelines are meticulously detailed to aid you in this process.
The configuration consists of 6 steps:
- Creating a Google Cloud Project
- Enabling the Admin SDK
- Configuring OAuth
- Creating a Service Account
- Setting Permissions.
- Kondukto Integration
1. Creating a project on Google Cloud
-
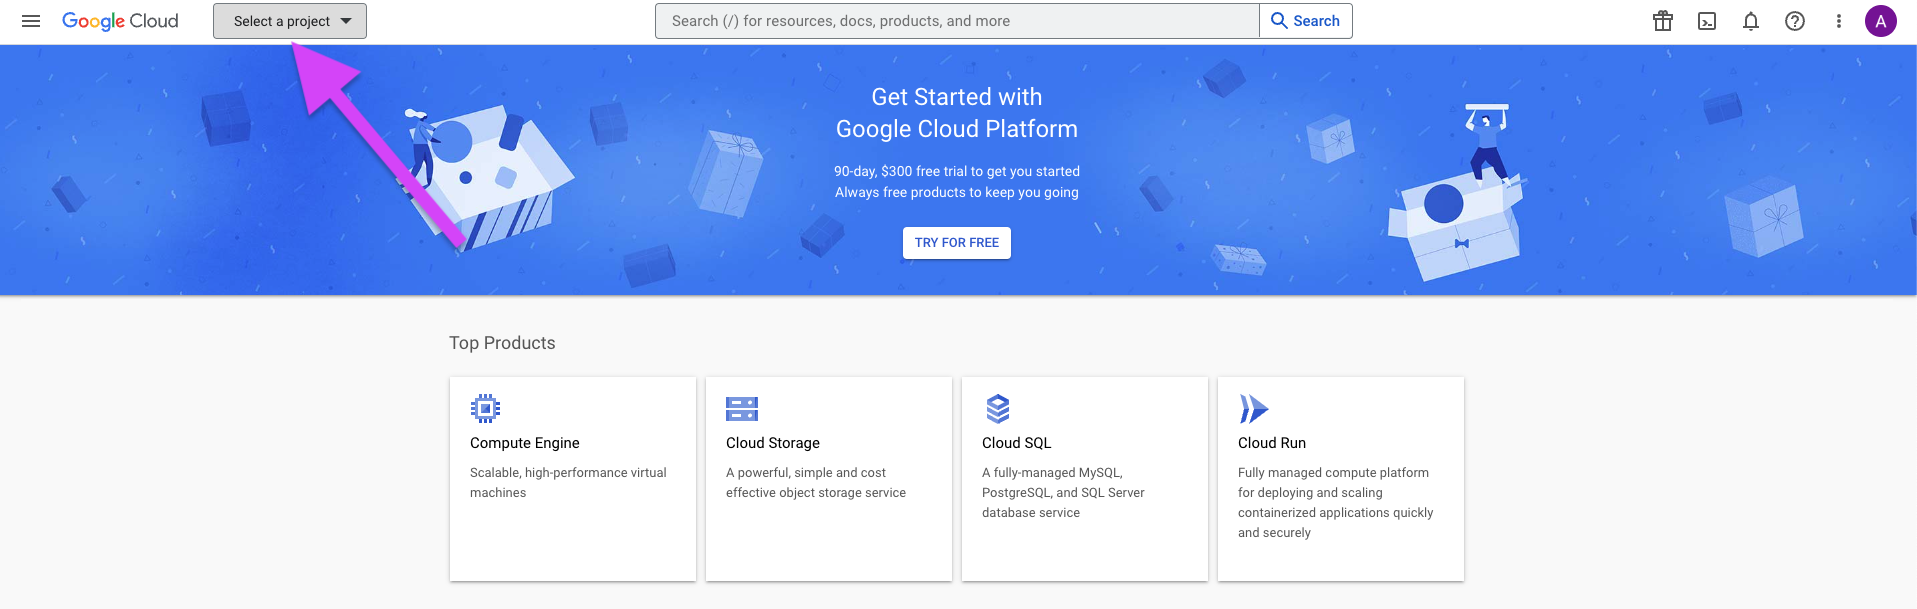
Sign in to Google Cloud Console.
-
Click on the Project Selector button in the top left corner.
-
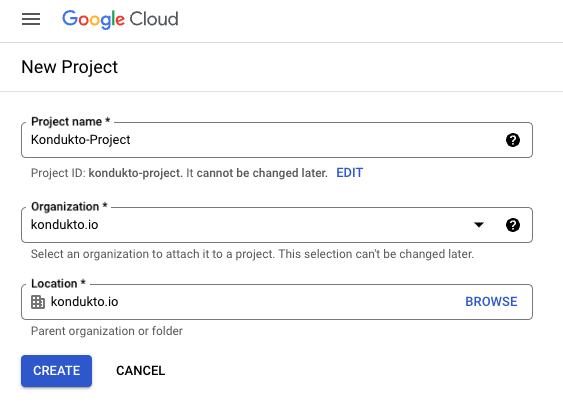
On the page that opens up, click on the New Project button.
-
Enter a name in the Project name field.
-
Select a valid organization in the Organization field or accept the default
value. -
Click on the Create button.
2. Enabling the Admin SDK
-
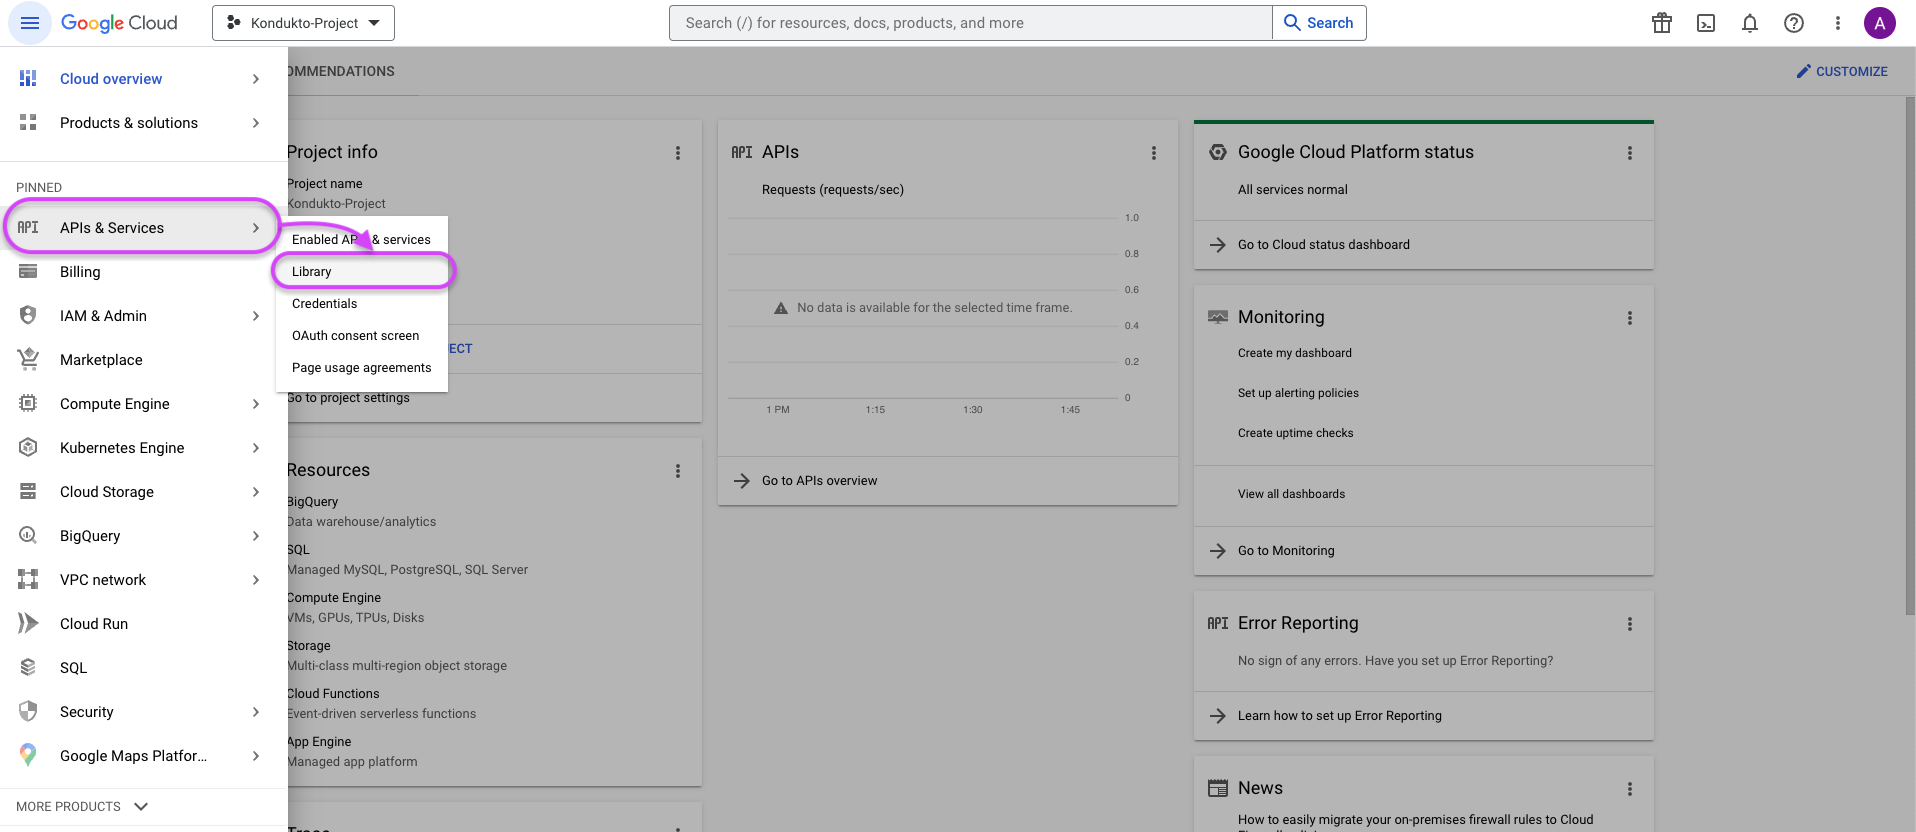
In the left menu, click on APIs & Services ➡️ Library.
-
On the Library page, type Admin SDK in the search box to find the Admin SDK API and press Enter↵.
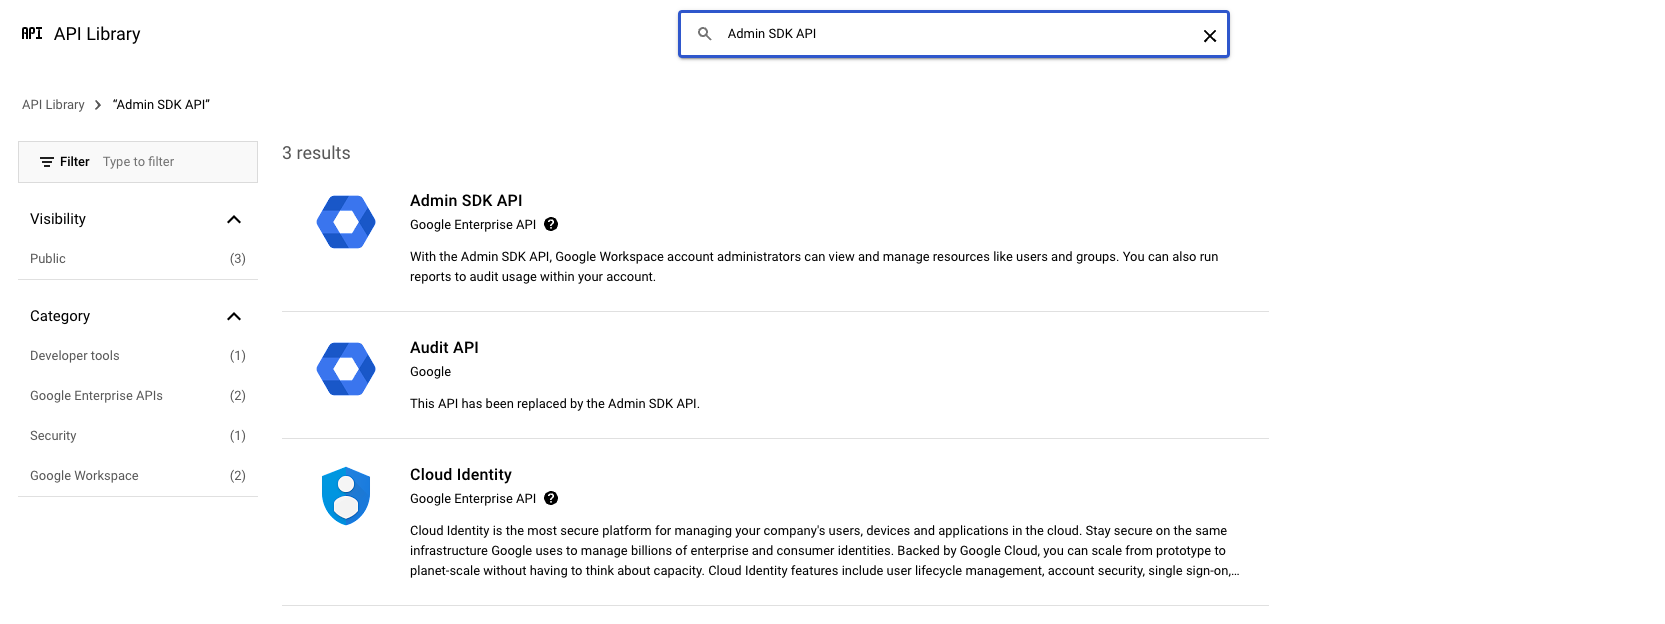
- Click on Admin SDK API and activate it by clicking the Enable button on the page that appears.
- The enabling process may take a few minutes.
3. Configuring the OAuth.
-
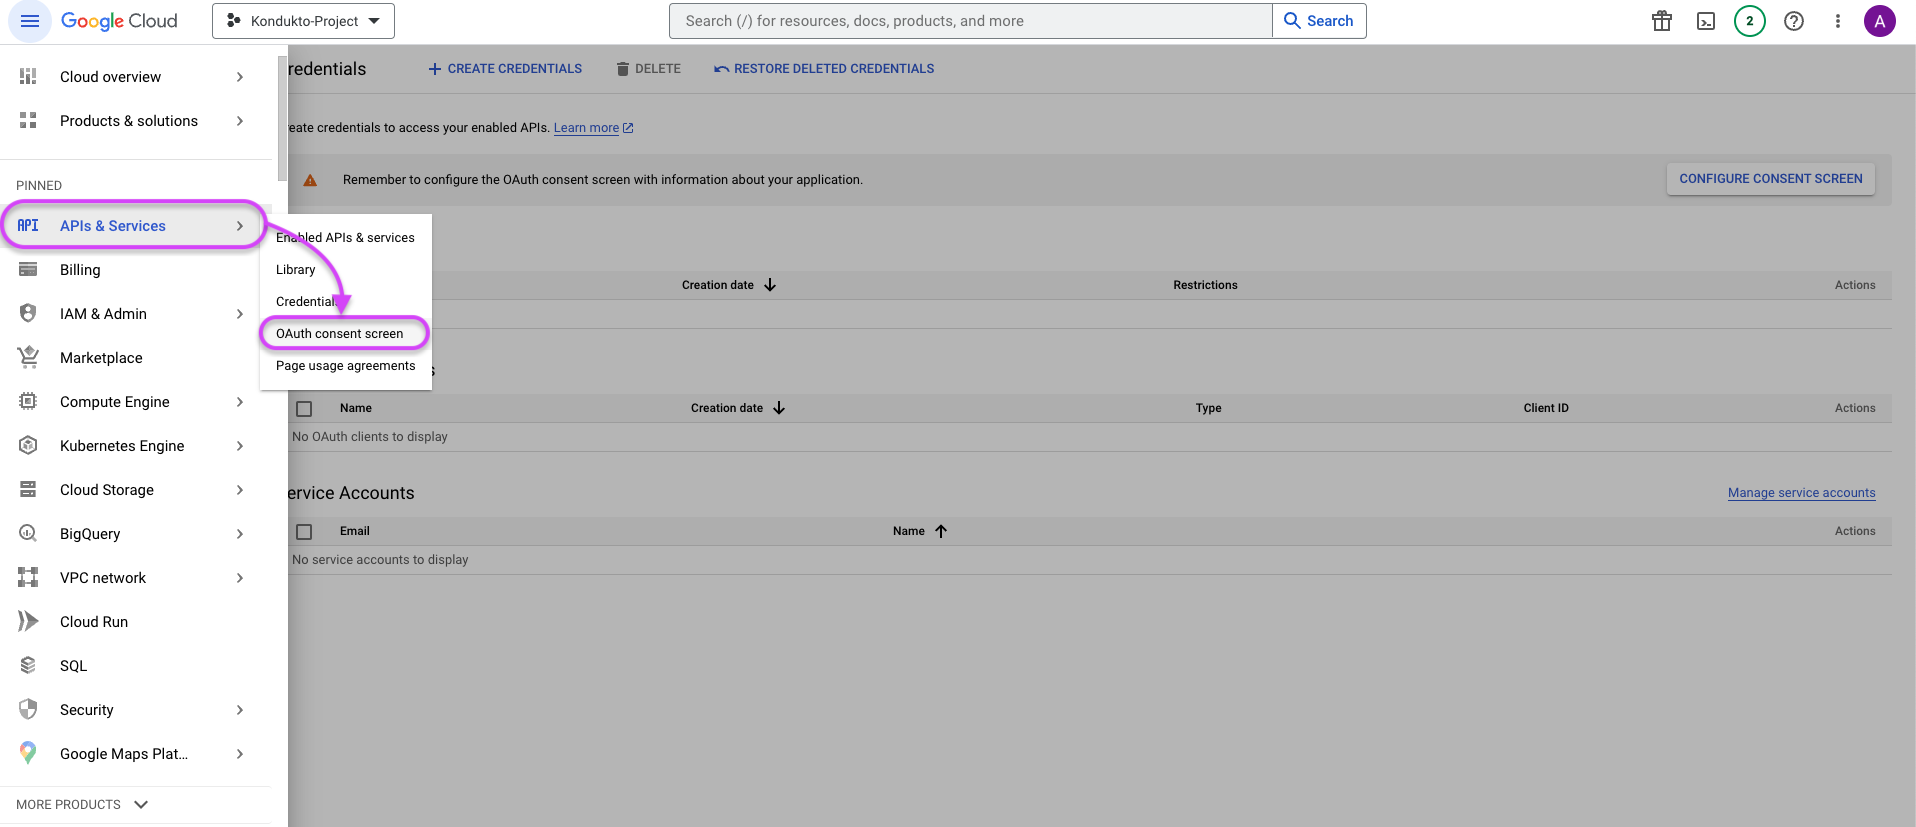
In the left menu, click on APIs & Services ➡️ OAuth consent screen.
-
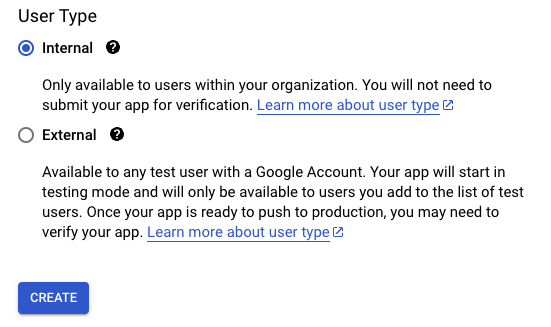
Select the Internal.
-
Click the Create button.
- In the Application name field, enter a name that will be displayed to users.
- Fill User support email and Developer contact information fields.
- Click the Save And Continue button.
- Proceed without selecting anything in the Scope section.
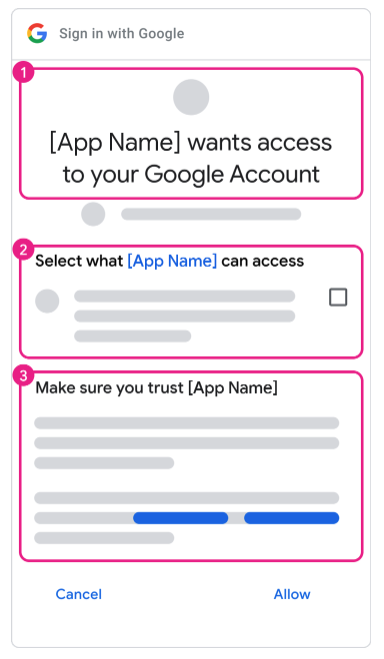
- Settings determine the design of the pairing screen during the Google connection.
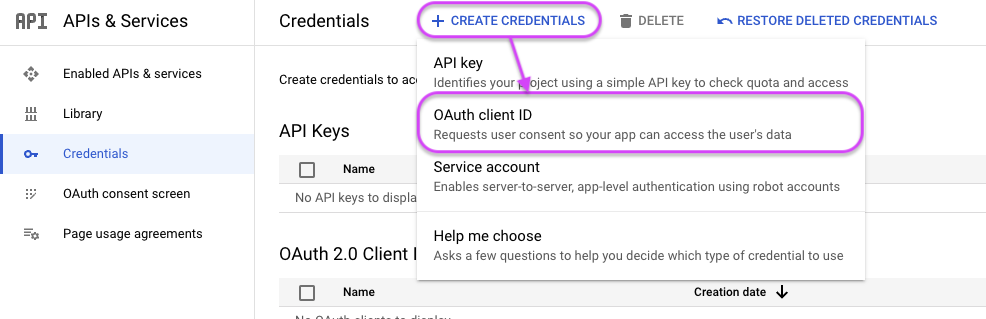
- In the left menu, click on APIs & Services ➡️ Credentials.
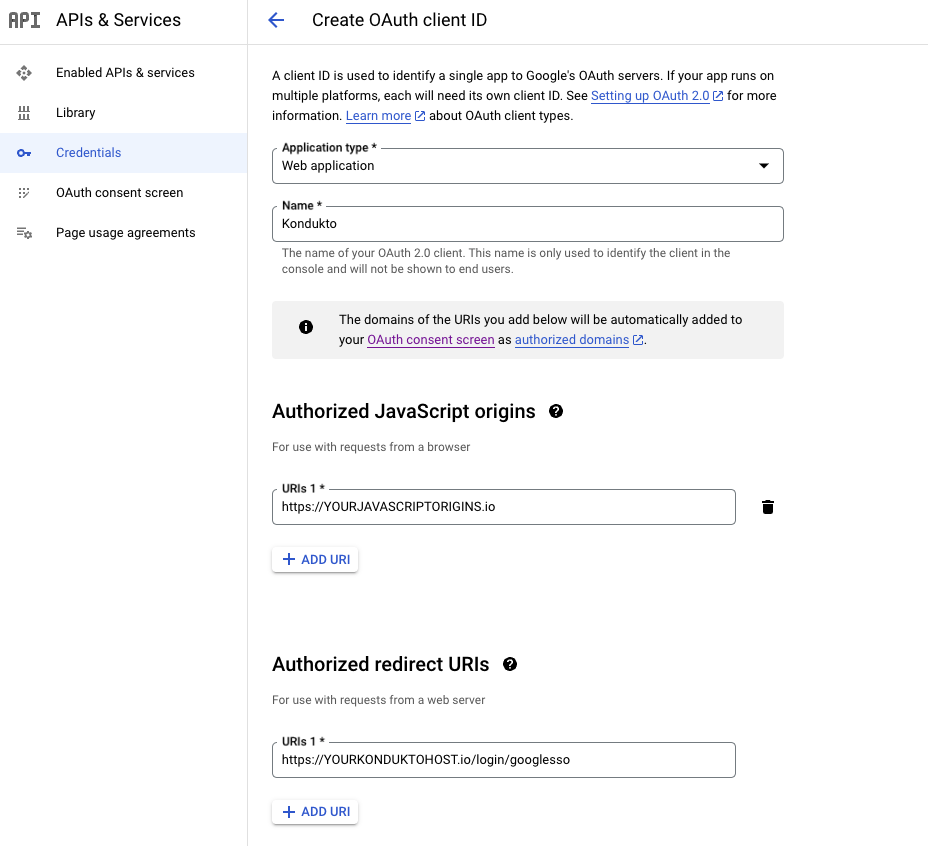
- On the Credentials page, click on the Create credentials button and select OAuth client ID.
-
In the Application type dialog box, select Web application.
-
In the Application name field, enter a name that will be displayed to users.
-
In the Authorized redirect URIs field, enter the URIs to which the user will be redirected after granting or denying consent. Necessary UI can be achieved by adding "~/login/googlesso" to the end of your kondukto host.
-
In the Authorized JavaScript origins field, enter the origins of your application.
-
Click the Create button.
-
Download Json File.
3. Creating a Service Account
-
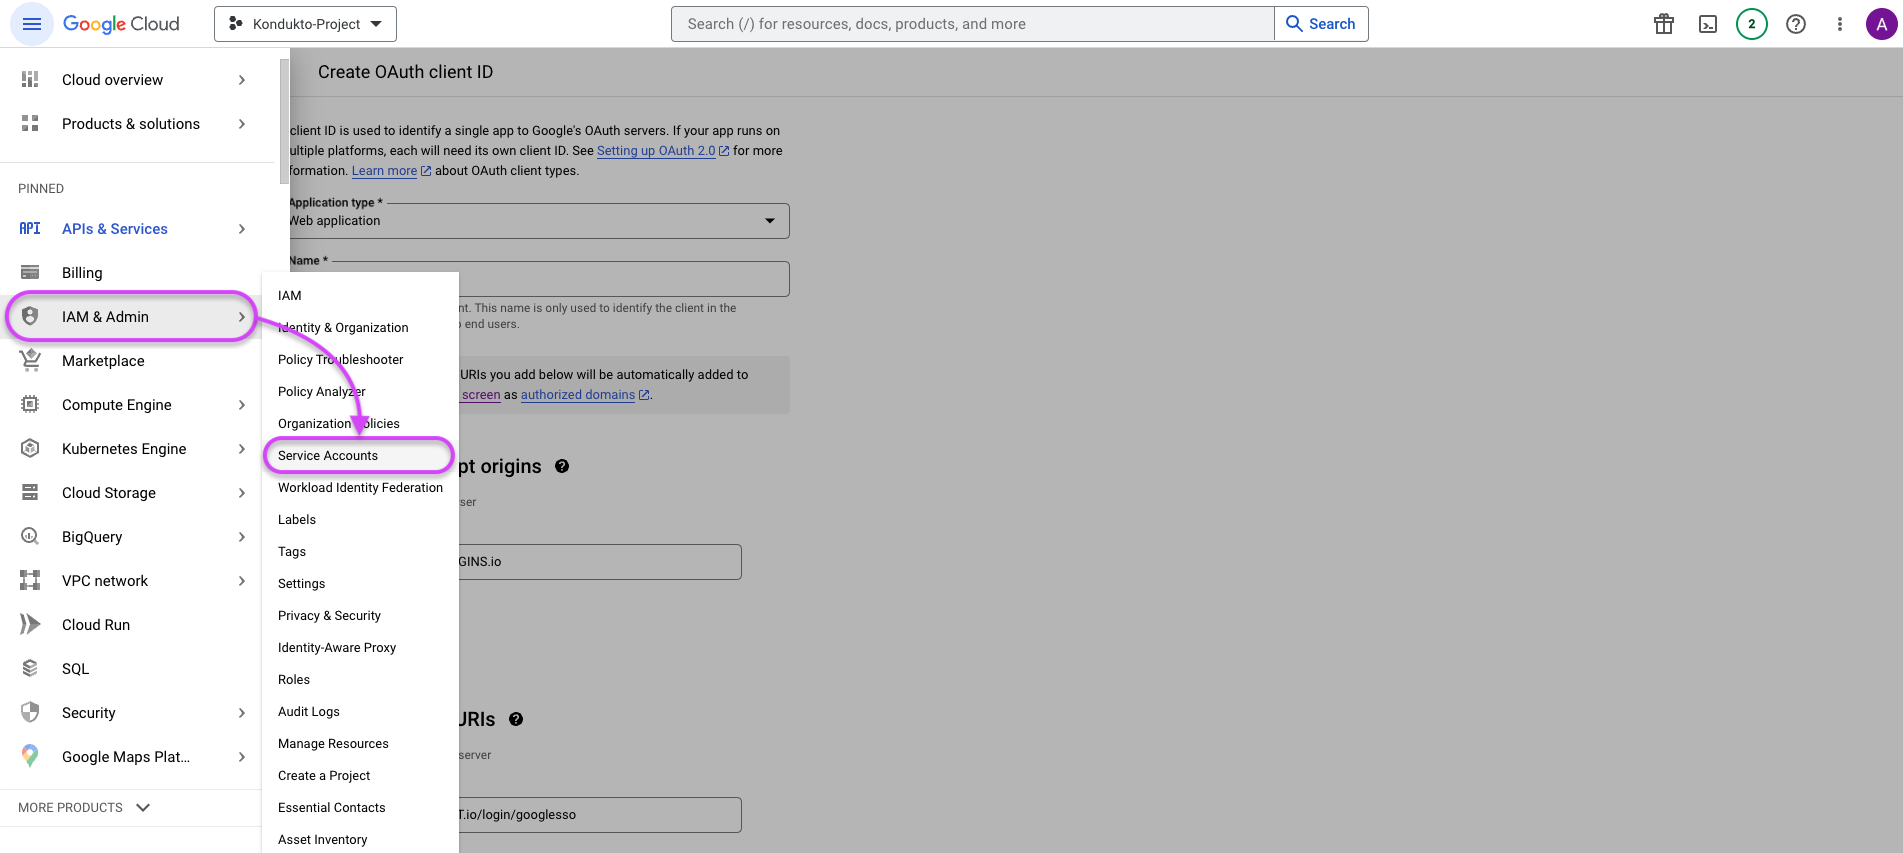
In the left menu, click on IAM & Admin ➡️ Service Accounts.
-
On the Service Accounts page, click on the Create Service Account button.
-
In the Service account name field, enter a name for the service account.
-
The Service account ID will be automatically generated.
-
Optionally, you can enter a description for the service account in the Service account description field.

-
Click the Continue button.
-
Click the Create button.
5. Setting Permissions
-
In the left menu, click on APIs & Services ➡️ Credentials.
-
Click on the name of your service account.
-
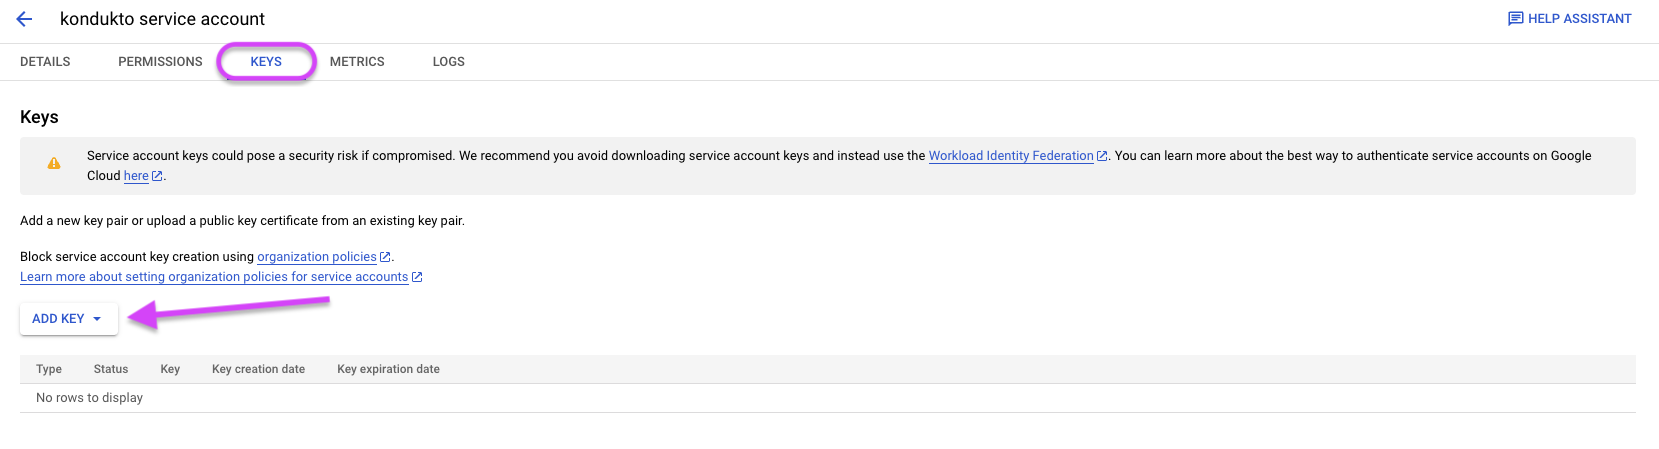
Click Keys tab.
-
Click on the Add Key button and select JSON.
-
Download and save the generated JSON file.
-
Go to Google Workspace Admin console.
-
In the Google Workspace admin console, click on Security ➡️ API Controls.
-
In the Domain wide delegation section, click on the Manage Domain Wide Delegation button.
-
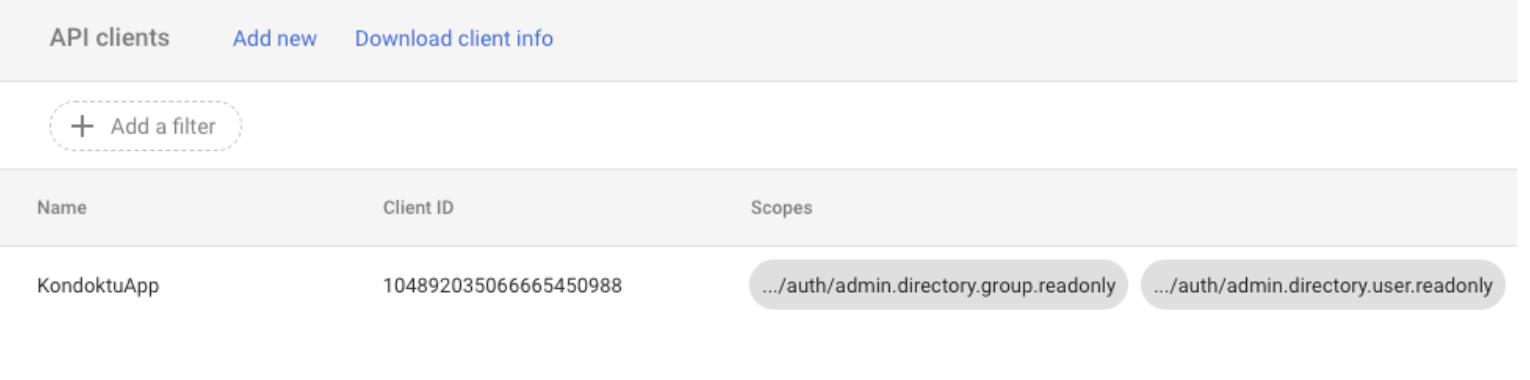
Click on the Add new button and enter the following information:
- "Client ID": Enter the "client_id" value from the JSON file.
- "One or More API Scopes": Enter the following scopes:
- https://www.googleapis.com/auth/admin.directory.group.readonly
- https://www.googleapis.com/auth/admin.directory.user.readonly
- Click the "Authorize" button.
- After these operations, we will have two Json files. The required fields for OAuth configuration are: client_id, client_secret.
- The required fields for Service user configuration are: private_key_id, private_key, client_id.
6. Kondukto Integration
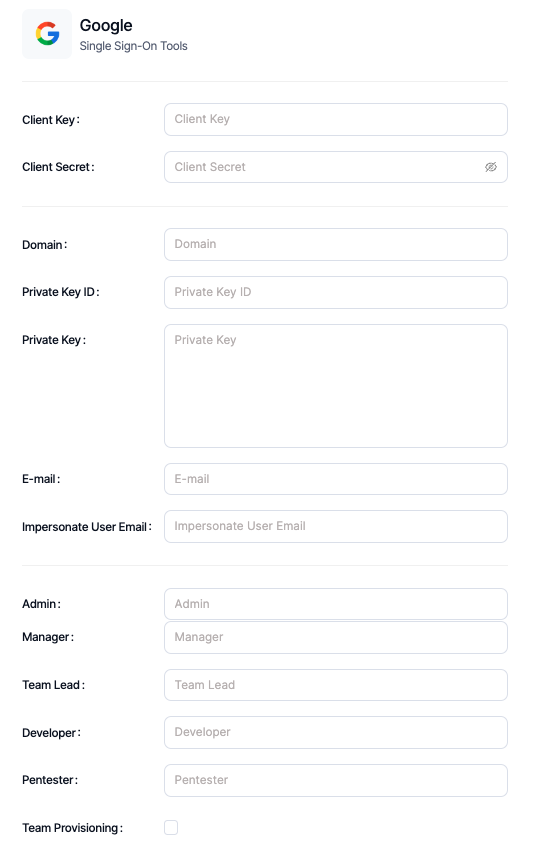
- In the left menu, click on APIs & Services ➡️ Credentials.
- Under the OAuth 2.0 Client IDs tab, enter the Web Application created for Kondukto.
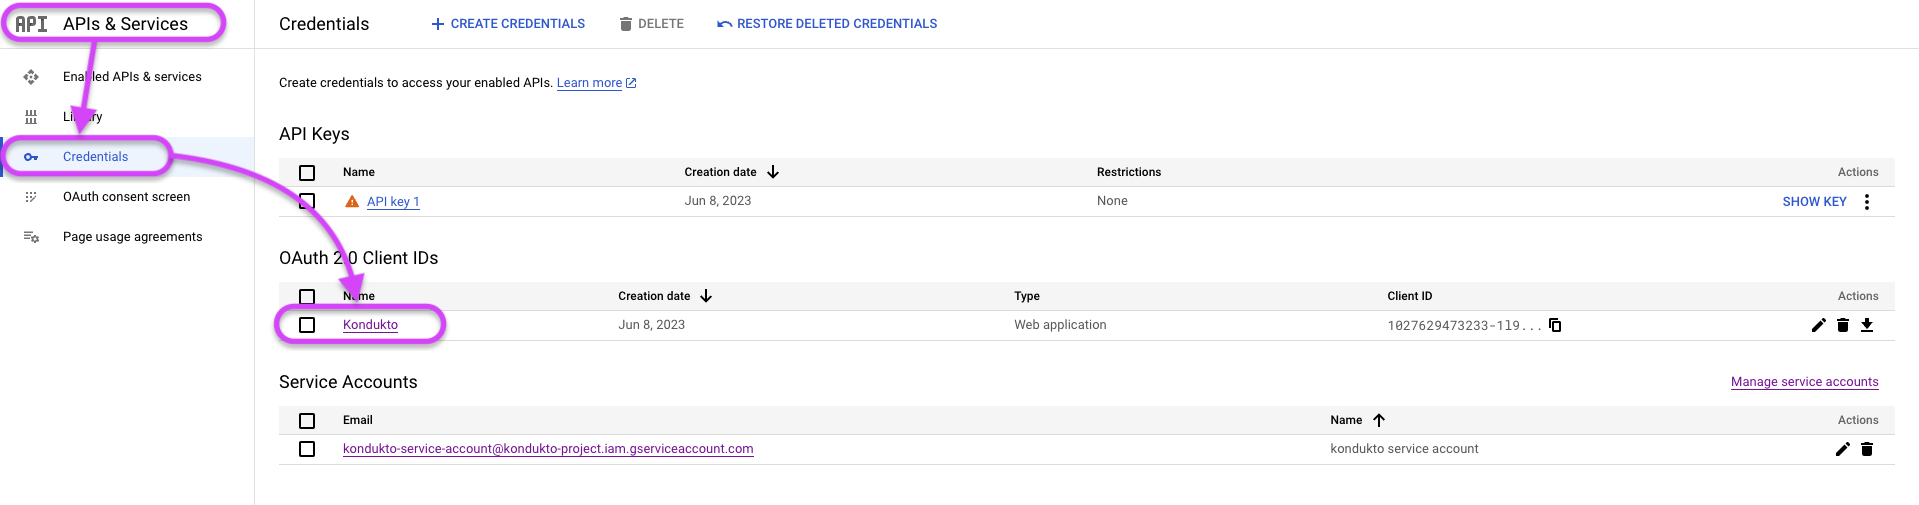
- Client ID and Client Secret can be obtained from this page.
- Private Key ID and Private Key variables can be obtained from the Json file created and downloaded in Step 5. The e-mail data can be obtained from the client_email variable in this file.

- Enter the administrator's e-mail address in the Impersonate User Email variable.
- Create 5 groups for Kondukto by going to Users & Teams from the left menu in Google Workspace.
- These groups can be as follows for best practices.
- KonduktoAdmin
- KonduktoManager
- KonduktoTeamLead
- KonduktoDeveloper
- KonduktoPentester
- Enter the created group names in the Integration section in Kondukto.
Updated 4 months ago