Azure Active Directory Integration
Azure Active Directory Configuration
- Visit https://portal.azure.com/#home
- Select Azure Active Directory from the Azure services list.
- Select App registrations from the left menu under the "Manage" group and click the "New
Registration" button. - Type "kondukto" into the name field, and select the supported account type to configure who can
access Kondukto from Azure Active Directory, select "Web" as the Redirect URI platform, add '{YOUR_KONDUKTO_HOST}/login/azureactivedirectory' as Redirect URI, and click on the "Register" button. - Select Certificates & secrets from the left menu under the Manage group in kondukto application registration.
- Select the Client Secrets tab and click the "New client secret" button.
- Type "kondukto" into the description field, select an expiration value from the list, and click the
"Add" button. - Copy the client's secret value to a safe place.
- Select API permissions from the left menu under the Manage group in the kondukto application
registration and click the "Add a permission" button. - Select the Microsoft APIs tab, select Microsoft Graph from the API list, and select the Application permissions value as the type of permission:
- Select and expand Application permissions from the permissions list and check Application.Read.All permission.
- Select and expand AppRoleAssignment permissions from the permissions list and check AppRoleAssignment.ReadWrite.All permission.
- Select and expand GroupMember permissions from the permissions list and check GroupMember.Read.All permission.
- Select and expand User permissions from the permissions list and check User.Read.All permission.
- Click the "Add permissions" button.
- In the same Microsoft APIs tab, select Microsoft Graph from the API list, select the Delegated permissions value as the type of permission:
- Select and expand OpenId permissions from the permissions list and check email, openid, profile permissions.
- Click the "Add permissions" button.
- Click on the "Grant admin consent for the default directory" button, then click on the "Yes" button on the popup confirmation panel.

- Select Token configuration from the left menu under the Manage group in kondukto application registration and click the “Add optional claim” button.
- Select the ID value as a token type and select the email, family_name, given_name, preferred_username claims from the claim list and click on the “Add” button.
- Check the checkbox and click on the “Add” button on the optional claim popup confirmation panel.
- Select App roles from the left menu under the Manage group in kondukto application registration and click the “Create app role” button.
- Enter “Kondukto Admin” value as Display name, select “User/Groups” value as Allowed member types, enter “KonduktoAdmin” value as Value, and enter “Kondukto Admin” value as Description and click on the “Apply” button.
- Enter “Kondukto Product Owner” value as Display name, select “User/Groups” value as Allowed member types, enter “KonduktoProductOwner” value as Value, and enter “Kondukto Product Owner” value as Description and click on the “Apply” button.
- Enter “Kondukto Manager” value as Display name, select “User/Groups” value as Allowed member types, enter “KonduktoManager” value as Value, and enter “Kondukto Manager” value as Description and click on the “Apply” button.
- Enter “Kondukto Team Lead” value as Display name, select “User/Groups” value as Allowed member types, enter “KonduktoTeamLead” value as Value and enter “Kondukto Team Lead” value as Description and click on the “Apply” button.
- Enter “Kondukto Developer” value as Display name, select “User/Groups” value as Allowed member types, enter “KonduktoDeveloper” value as Value, and enter “Kondukto Developer” value as Description and click on the “Apply” button.
- Enter “Kondukto Pentester” value as Display name, select “User/Groups” value as Allowed member types, enter “KonduktoPentester” value as Value, and enter “Kondukto Pentester” value as Description and click on the “Apply” button.

- Select Overview from the left menu.
- Copy Application (client) ID and Directory (tenant) ID to a safe place.
- Click the “kondukto” value in the connection link “Managed application in local directory” in
Essentials panel.

- Select Properties from the left menu.
- Select the value of “Assignment required?” as “Yes” then click on the “Save” button.

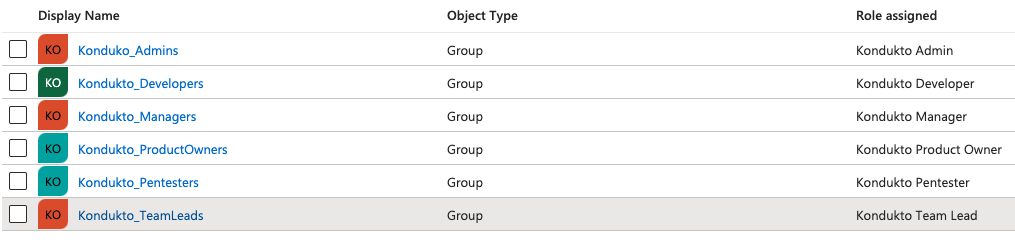
- Select Users and groups from the left menu, then click on the “Add user/group” button.
- Select a group and assign the group with “Kondukto Admin” role and then click on the “Assign”
button. - Select a group and assign the group with “Kondukto Product Owner” role and then click on the “Assign” button.
- Select a group and assign the group with “Kondukto Manager” role and then click on the
“Assign” button. - Select a group and assign the group with “Kondukto Team Lead” role and then click on the
“Assign” button. - Select a group and assign the group with “Kondukto Developer” role and then click on the
“Assign” button. - Select a group and assign the group with “Kondukto Pentester” role and then click on the
“Assign” button.
Kondukto Configuration
- Login to your Kondukto application with a user who has the admin role.
- Select “Settings” from the left menu.
- Select “Single Sign-On-Tools” from the Integrations menu.
- Create or Update the Azure Active Directory.
- Enter Tenant ID, Client ID, and Client Secret information of your Azure Active Directory
application, which is named kondukto - Map roles defined in Azure Active Directory kondukto application with listed Kondukto roles.

Updated 3 months ago
Did this page help you?