Checkmarx Integration
Prerequisites
A dedicated Checkmarx user with permissions to create projects, modify project settings, and trigger scans is required for the integration. Since Checkmarx uses a team-based authorization model, this user must have access to all relevant projects to prevent access issues.
As a best practice, we recommend creating an Invicti ASPM Service Account for this purpose. By onboarding projects through this service account, you can:
- Avoid access conflicts
- Clearly distinguish between projects created by Invicti ASPM and those created manually through the Checkmarx UI
Once the service account is created, securely note the username and password. After preparing the Checkmarx base URL, you can proceed with the integration directly from the Invicti ASPM UI.
Integration Setup
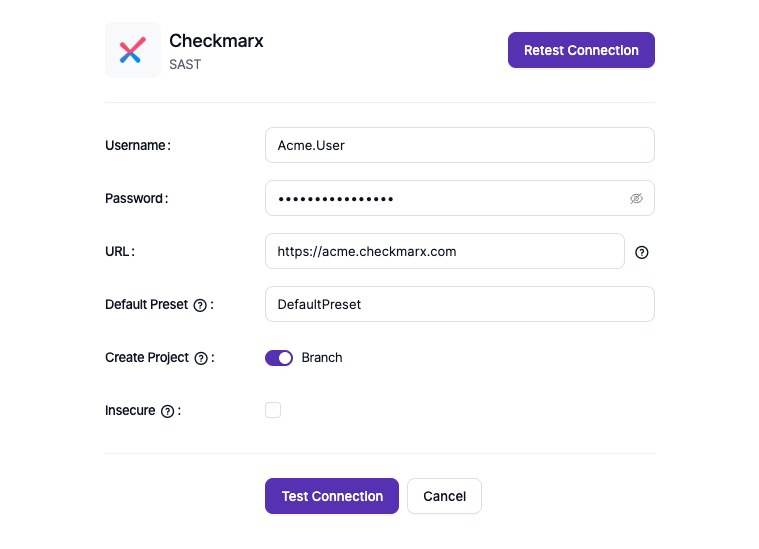
After entering all required credentials, select the Default Preset used by your organization. Unless another preset is explicitly defined, this preset will be applied to all future scans by default.
Next, choose how new projects will be created by selecting either the Project or Branch option. This selection determines the structure for all newly onboarded projects through KDT:
If the Project option is selected, a new standalone project will be created in Checkmarx for each onboarded application. Each project will consume one license from your Checkmarx entitlement.
If the Branch option is selected, new projects will be created as branch projects under existing parent projects in Checkmarx. These will appear as branches under the main project structure.
For optimal performance and clearer license tracking, we recommend using the Project option.
Scheduling Scans
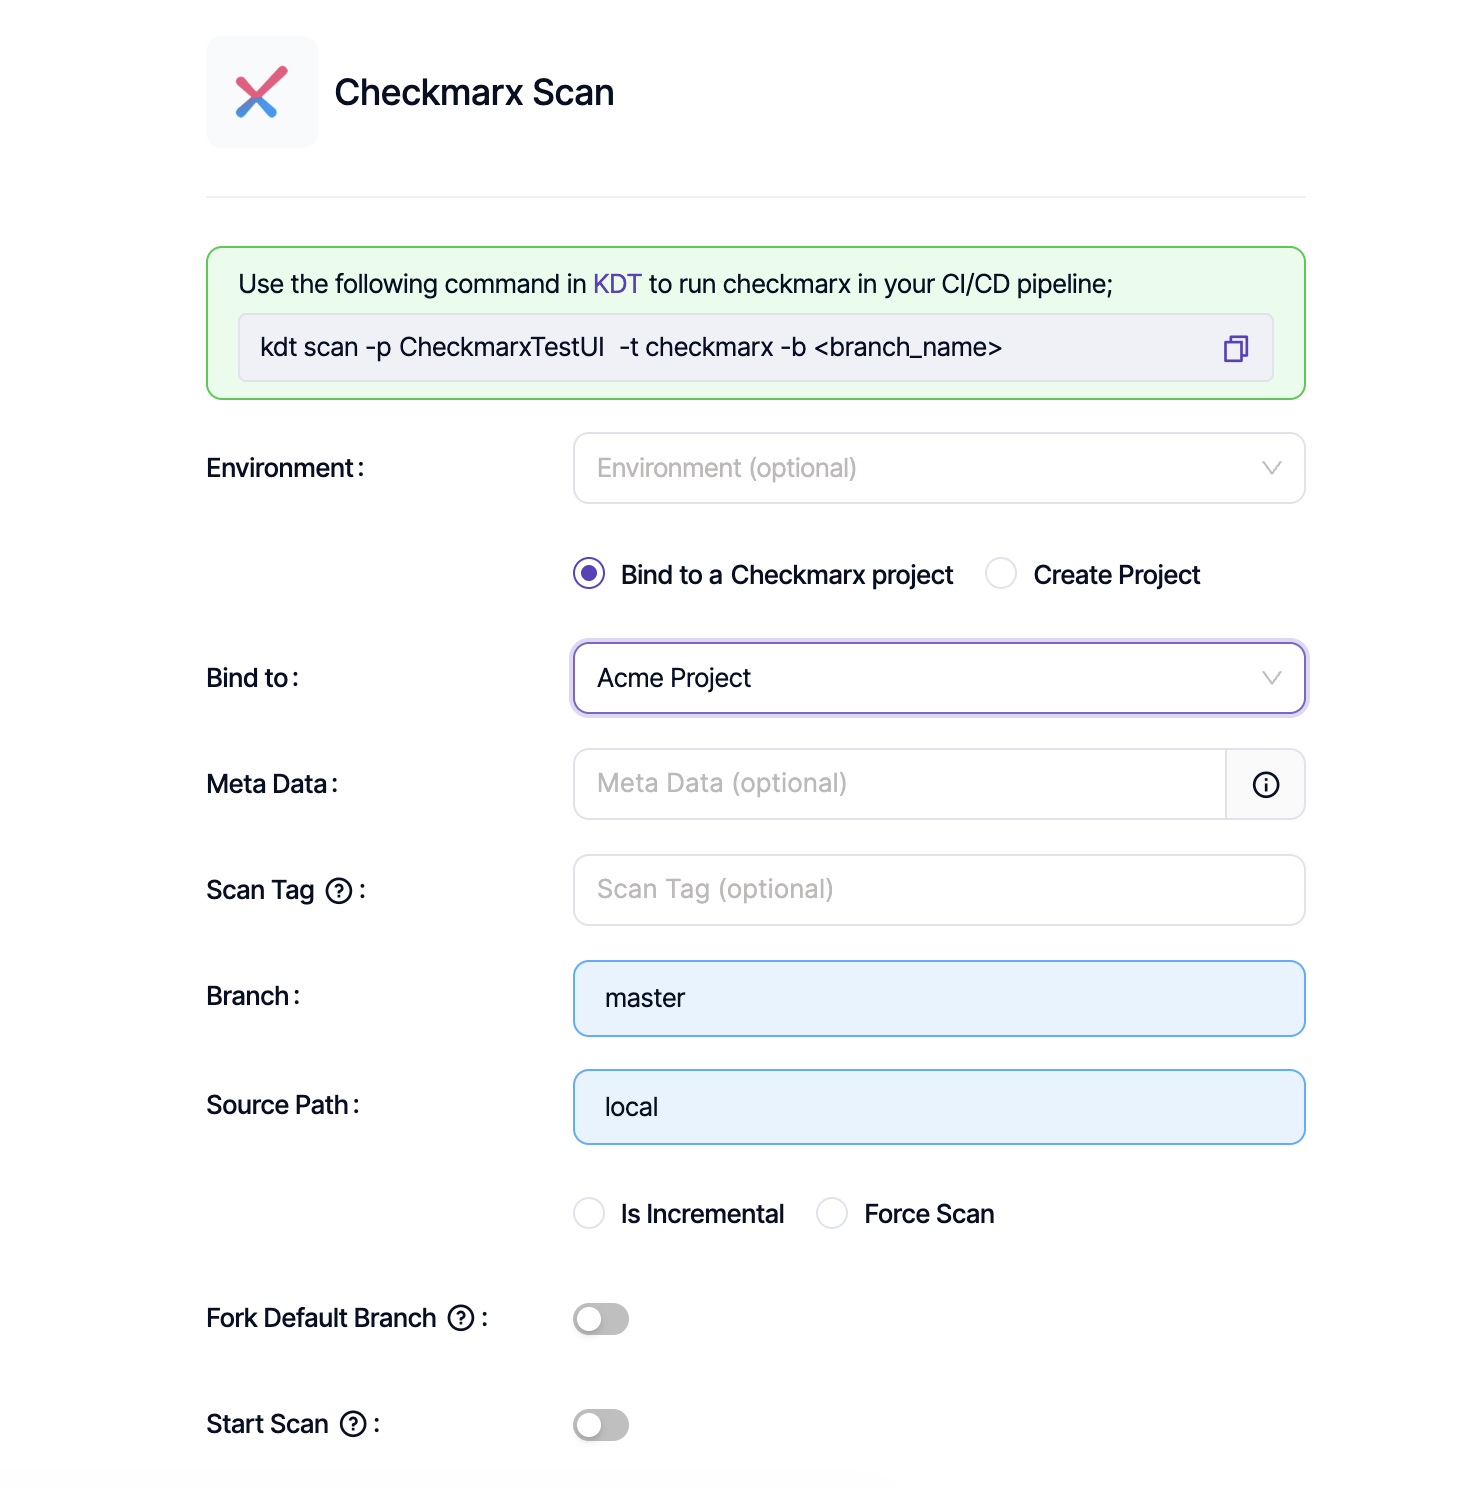
During the Scan Parameter configuration step, several parameters must be defined:
Project Configuration
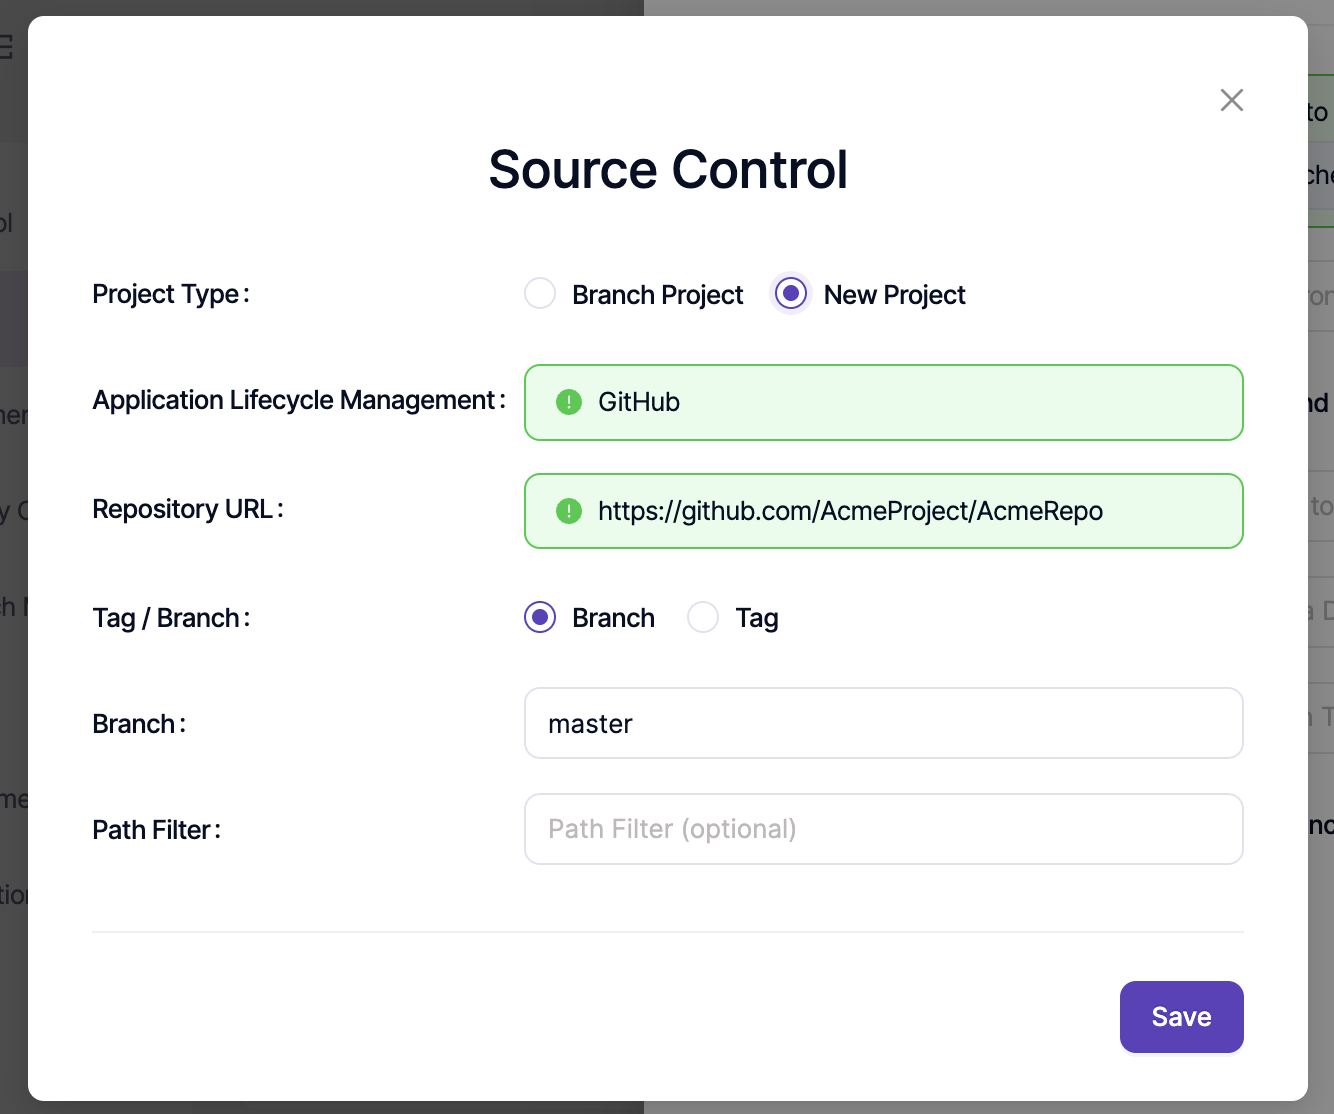
- Existing Project: If the target project already exists in Checkmarx, select it using the Bind To option
- New Project: If the project does not exist, create it through the Create Project option
Scan Type Selection
After selecting or creating the project, define the scan type:
- Incremental Scan: Analyzes only newly added or modified lines of code; completes significantly faster
- Full Scan: Scans the entire codebase; takes full scan duration to complete
The Start Scan option determines whether a new scan will be triggered immediately, or if the latest existing scan result from Checkmarx will be fetched instead.
In some cases, additional settings must be configured, or certain prerequisites must be met on the Checkmarx side. For example, if the Start Scan option is disabled, at least one scan must have been completed previously in Checkmarx. Such dependency-related issues can be reviewed through the Failed Reason field when a scan fails.
Troubleshooting Configuration Issues
If an error occurs while saving the configuration, review the details under the System Logs section. Common errors include:
- License limits being exceeded
- Project validation failures
For resolution, create a support request by sharing the relevant logs via Invicti Help Center.