Nessus Pro (Professional) Integration
Prerequisites
To integrate Nessus Pro, it is recommended as a best practice to first create a dedicated Nessus Pro service account. This account is generally recommended to have admin-level permissions. After creating this user, the integration can be completed by following the steps outlined below.
Integration Setup
To enable integration, an API key must be generated for the Nessus Pro service account.
- Log in to the Nessus Pro interface using the service account credentials.
- Navigate to the User menu by clicking on the username displayed in the top-right corner of the interface.
- From the dropdown menu, open the My Account or Settings page (menu naming may vary depending on the Nessus version).
- Locate the API Keys section.
- Click Generate (or Create API Keys) to create a new API key pair.
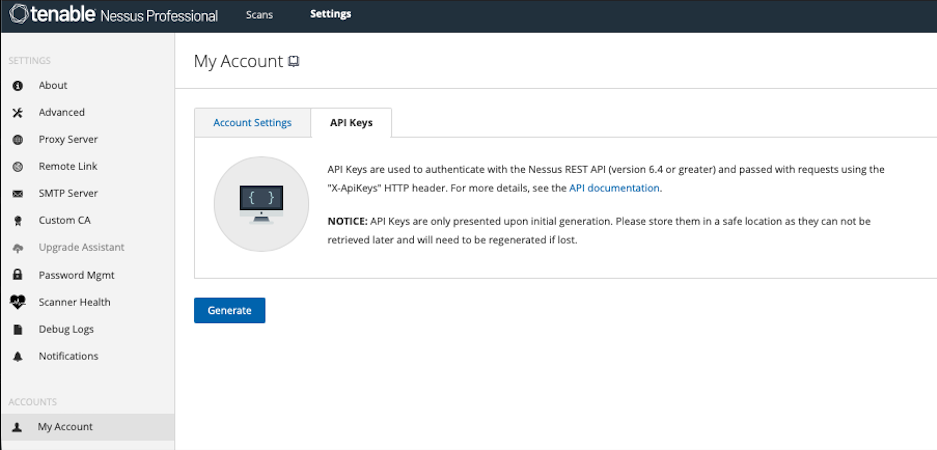
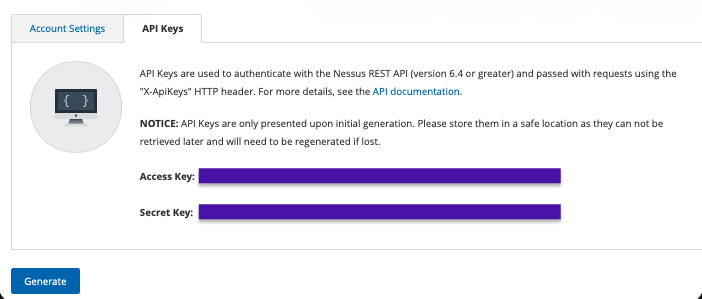
- Once generated, the Access Key and Secret Key will be displayed.
- Both keys should be securely stored, as the Secret Key will not be shown again.
After the API keys are created, the integration can be completed through the Invicti ASPM user interface.
- Log in to Invicti ASPM using an Admin-level account.
- Navigate to Integrations ➡️ Scanners ➡️ Infra.
- Select Nessus Pro and click Active.
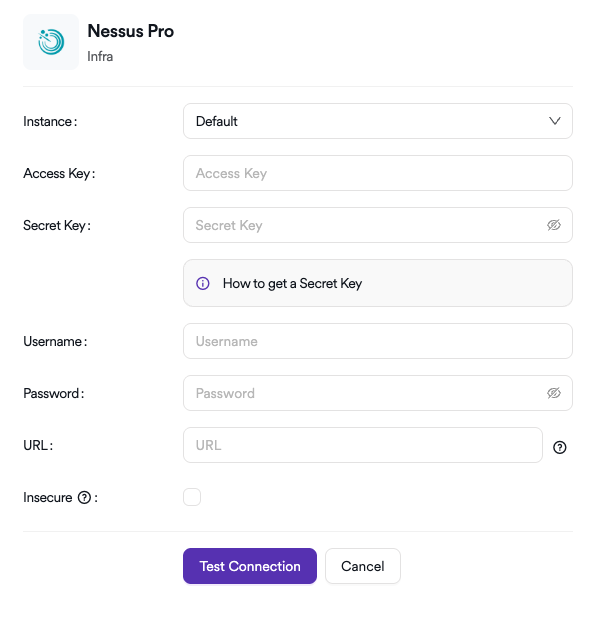
- On the configuration screen, provide the following information:
- Enter the Access Key and Secret Key.
- Enter the Service Account Username and Password.
- Enter the IP address or DNS name of the Nessus Pro instance.
The Access Key and Secret Key are used for API-based data retrieval.
The Username and Password are required for certain non-API actions, such as initiating scans.
For this reason, both token-based authentication and basic authentication details are required.
- Click Test Connection to validate the configuration.
Once the connection test is successful, the configuration can be saved and the integration will be ready for use.
In infrastructure scanners, a single scan may include vulnerabilities that belong to multiple operational groups. For example, issues related to the operating system or to components such as databases installed on a target machine may require intervention from different teams. For this reason, unlike application-level scanners, infrastructure scanners are managed through centrally created profiles.
More detailed information is available at: Infra Profiles Documentation
Creating Scan Parameters
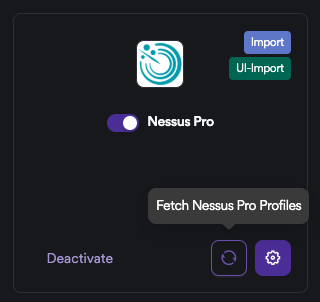
After Nessus Pro is successfully integrated, there are multiple ways to add and manage profiles. Profiles can be imported directly from the Integrations section or created manually. To add profiles automatically, the button shown in the interface can be used.
If profiles are to be managed manually, the steps below can be followed.
Navigate to Automation ➡️ Setup ➡️ Infra Profiles, then click the + Add New Profile button on the right and select Nessus Pro.
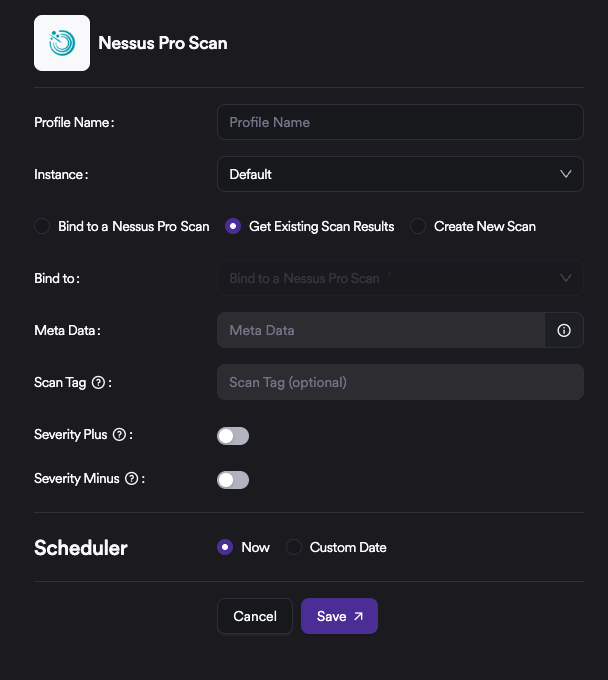
- Define a Profile Name. This name should align with how the asset inventory is organized and maintained.
- Select how scans will be executed:
- Create New Scan: IP addresses can be defined and scan settings such as Policy, Name, and Target can be configured to create a new scan.
- Get Existing Scan Results: Existing active scans on the Nessus side are selected, and their results are imported into the system.
- Bind To a Nessus Pro Scan: Profile-based scanning: An existing profile can be selected and used for active scanning.
As a best practice, the Get Existing Scan Results option is recommended. In Invicti ASPM, each active scan consumes one concurrent scan slot. Infrastructure scans, such as those run by Nessus, may take several hours to complete. Running these scans directly from Invicti ASPM may therefore reduce available concurrent scan capacity and cause queue buildup. A commonly recommended approach is to execute scans on the Nessus side and then import the results into Invicti ASPM. For example, scans may complete on Nessus over the weekend, and results can be synchronized into the platform afterward.
Scans can still be orchestrated directly from Invicti ASPM if required.
- Define Meta Data. While Meta Data is optional for most scanners, it is mandatory for infrastructure scans. Meta Data enables effective grouping and filtering of vulnerabilities during management and analysis.
- Configure Severity Plus and Severity Minus options if needed. When enabled, these settings increase or decrease the severity level of incoming vulnerabilities by one level based on the selected configuration.