Invicti Enterprise DAST/API Integration
Invicti Enterprise is a powerful on-premise or private-cloud DAST solution for large organizations. This integration allows Invicti ASPM to trigger scans, import findings, and manage vulnerabilities from Invicti Enterprise.
Prerequisites
| Field | Description |
|---|---|
| Invicti Enterprise URL | The base URL of your Invicti Enterprise instance (e.g., https://invicti.your-company.com) |
| API Token | A personal or service account API token from Invicti Enterprise |
How to Get an API Token (on Invicti Enterprise Side)
- Log in to your Invicti Enterprise instance.
- Click your profile icon in the upper right corner.
- Select My Account from the dropdown.
- Navigate to the API Token section.
- Click Generate New Token.
- Copy the token immediately — it is shown only once.
Step 1: Navigate to Integrations
From the left sidebar menu, click on Integrations.
Step 2: Select the DAST/API Tab
On the Integrations > Scanners page, click on the DAST/API tab.
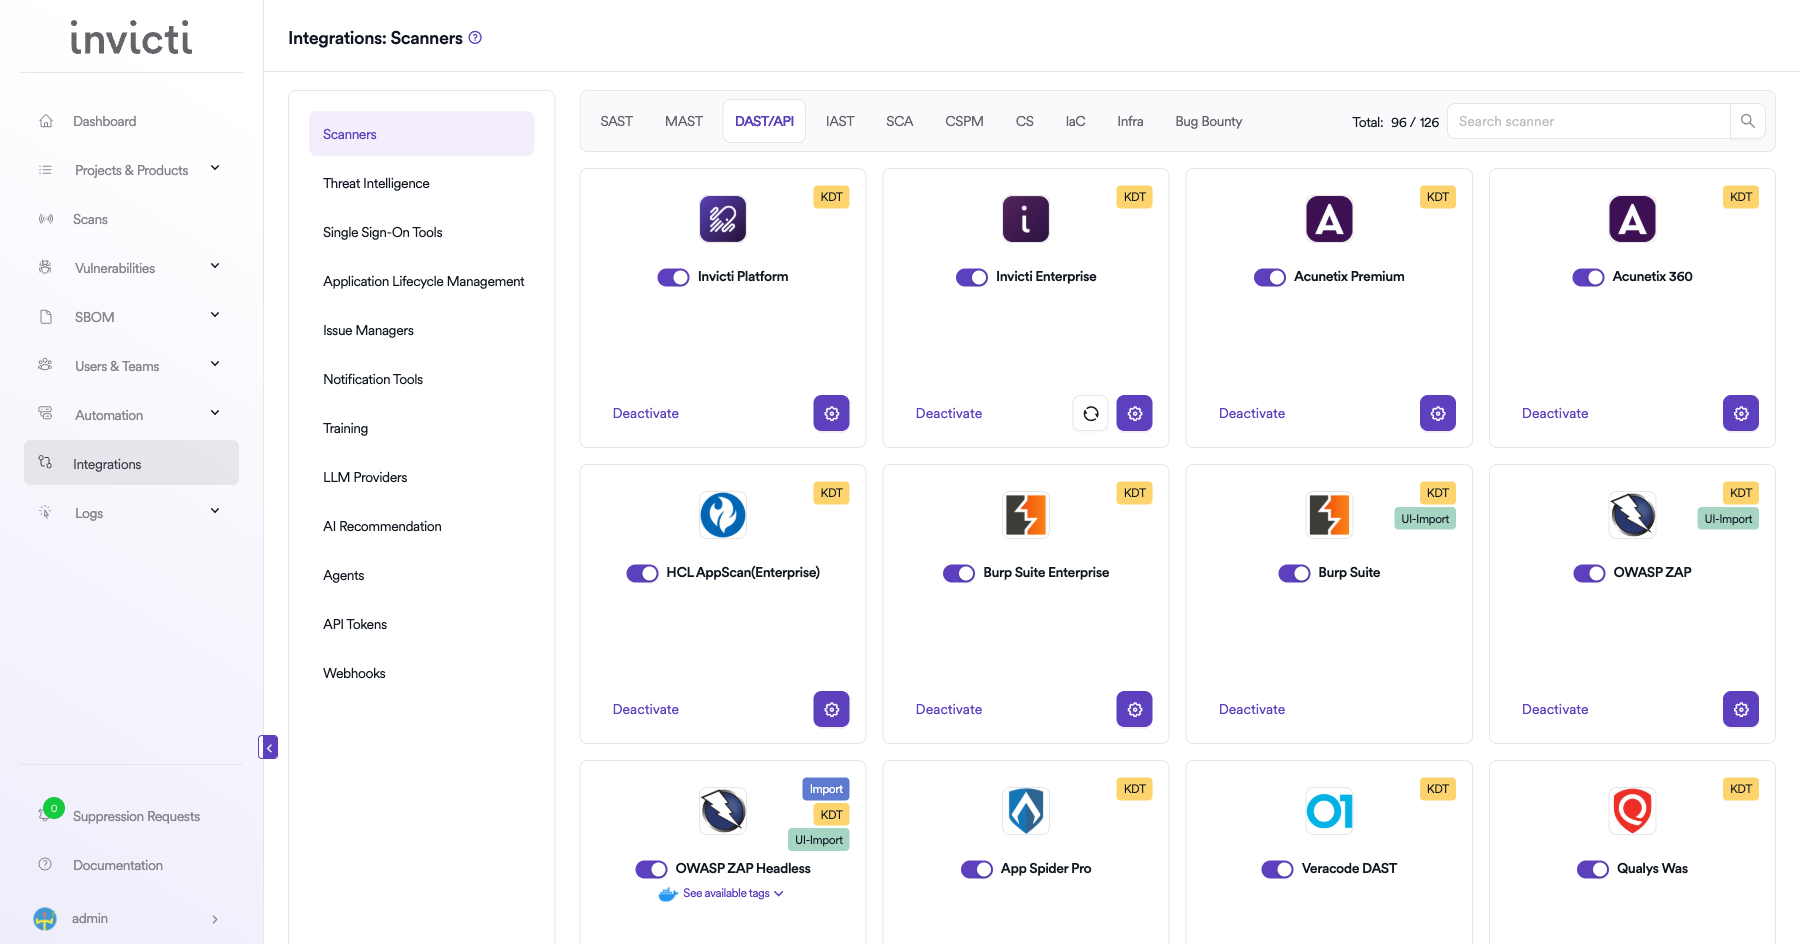
Step 3: Find and Activate Invicti Enterprise
Scroll through the list of DAST/API scanners to find Invicti Enterprise.
-
If Invicti Enterprise is not activated, you will see an "Activate" button. Click it to enable the integration.
Note: The scan method badge on the Invicti Enterprise card shows KDT, which means scans are triggered through the Kondukto CLI tool (KDT).
Step 4: Configure Connection Settings
Click on the gear icon on the Invicti Enterprise card to open the configuration panel. Fill in the required fields:
- Username: Enter your Invicti Enterprise account username.
- Token: Paste the API token generated from your Invicti Enterprise account.
- URL: Enter your Invicti Enterprise base URL (e.g.,
https://www.netsparkercloud.com). - Insecure: Enable this checkbox only if your Invicti Enterprise instance uses a self-signed SSL certificate.
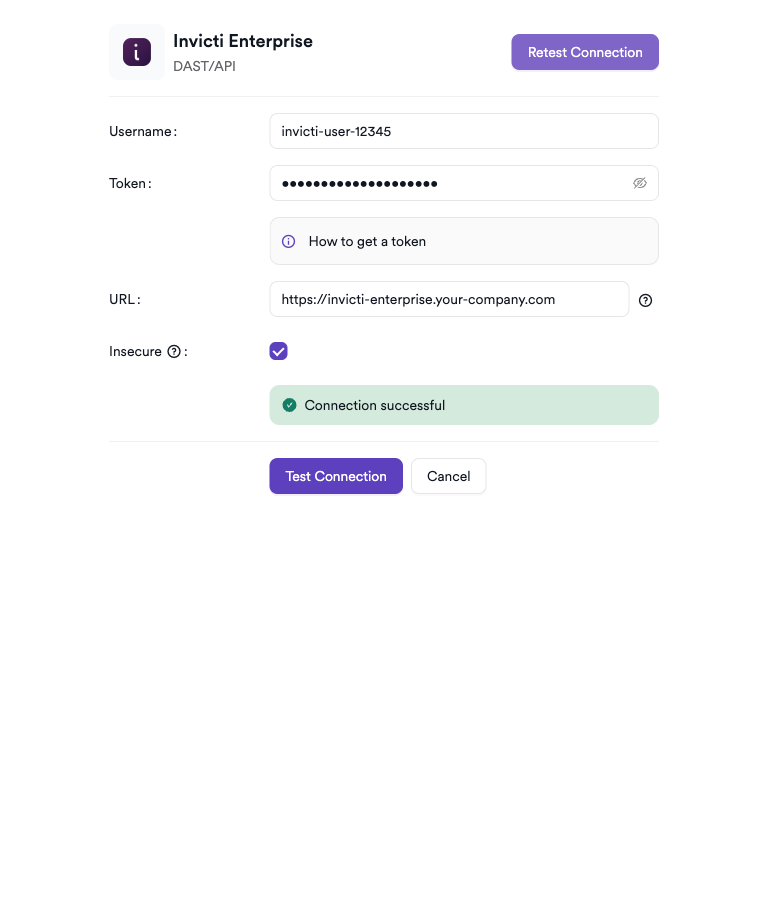
Step 5: Test the Connection
Click Test Connection. A green Connection successful message confirms that Invicti ASPM can communicate with your Invicti Enterprise instance.
Summary
| Step | Action |
|---|---|
| 1 | Navigate to Integrations from the sidebar |
| 2 | Select the DAST/API tab |
| 3 | Activate the Invicti Enterprise scanner |
| 4 | Enter URL and API Token |
| 5 | Test the connection |
How to Create a Scan
Navigate to Project Scanners
- Open a project in Invicti ASPM.
- Go to Settings > Scanners.
- Click Add Scanner.
Add Invicti Enterprise Scanner
- Select DAST/API as the scanner type.
- Choose Invicti Enterprise from the scanner list.
- Click Add to open the scan configuration drawer.
Scan Configuration Fields
| Field | Description | Required |
|---|---|---|
| Environment | Select the environment for the scan | No |
| Bind To | Invicti Enterprise project to bind to | Yes |
| Scan Type | Select scan type: New, Incremental, or Retest | No |
| Start Scan | Toggle to trigger the scan immediately | No |
| Branch | Source code branch associated with this scan | No |
| Meta Data | Additional metadata for the scan | No |
| Scan Tag | Tag to identify the scan | No |
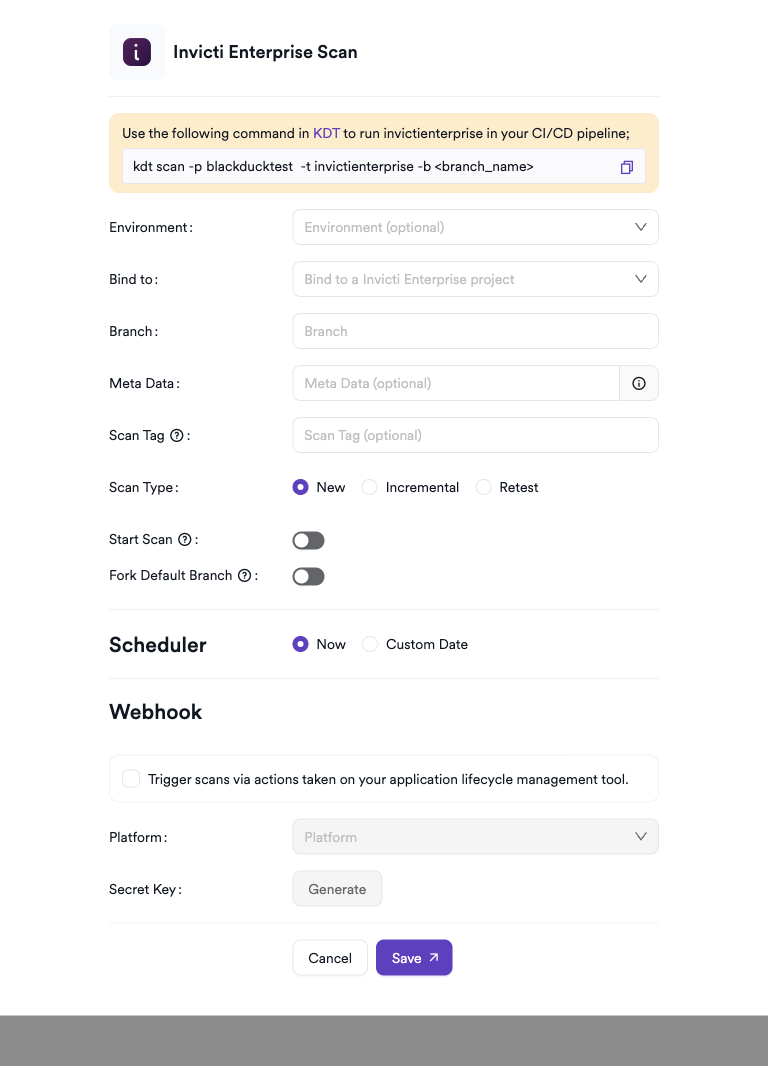
Scheduler
Enable the Scheduler toggle to run this scan on a recurring schedule.
Webhook (Optional)
Add a webhook URL to receive scan status notifications.
KDT Command
kdt scan -p <project_name> -t invicti-enterprise -b <branch_name>Troubleshooting
Connection Fails
| Issue | Resolution |
|---|---|
| Invalid API token | Regenerate the token from Invicti Enterprise and update the settings |
| Wrong URL | Ensure the URL points to your on-premise instance and includes https:// |
| Self-signed SSL certificate | Configure Invicti ASPM to trust your organization's CA certificate |
| Network/firewall | Ensure network connectivity between Invicti ASPM and the Enterprise host |
Scan Issues
| Issue | Resolution |
|---|---|
| No scan profiles listed | Verify the API token has sufficient permissions to list scan profiles |
| Scan not starting | Ensure the Invicti Enterprise scan engine is running and reachable |
| Empty results | Confirm the scan reached a completed state in Invicti Enterprise |
| Permission denied | The service account must have at minimum a Scan Manager role |
Best Practices
- Use a dedicated service account with limited, read-write scan permissions.
- Rotate the API token every 90 days and update the integration immediately.
- Use HTTPS with a CA-signed certificate for your on-premise deployment.
- Restrict the service account's accessible websites to only the target applications.
- Align scan profiles with the application type (authenticated web app, REST API, GraphQL).
Limitations
- The on-premise deployment must be network-accessible from Invicti ASPM.
- Feature availability (e.g., API scanning, authenticated scans) depends on your Invicti Enterprise license tier.
- Large scan result sets may take additional time to import depending on Invicti Enterprise API response times.
- Concurrent scan limits are governed by your Invicti Enterprise license seat count.
Updated 3 months ago