Qualys WAS DAST/API Integration
Qualys Web Application Scanning (WAS) is a cloud-based DAST solution for discovering and cataloging web applications and detecting vulnerabilities with high accuracy. This integration allows Invicti ASPM to trigger Qualys WAS scans and import findings.
Prerequisites
| Field | Description |
|---|---|
| Qualys Platform URL | Your Qualys API gateway URL (e.g., https://qualysapi.qualys.com) |
| Username | Qualys account username |
| Password | Qualys account password |
How to Get Credentials (on Qualys Side)
- Log in to the Qualys Platform .
- Your API server URL is shown on the platform identification page based on your account region (e.g.,
qualysapi.qualys.com,qualysapi.qg2.apps.qualys.com). - Use the same username and password you use to log in to the Qualys portal for API access.
- Ensure the account has the WAS Module enabled and API access permissions.
Step 1: Navigate to Integrations
From the left sidebar menu, click on Integrations.
Step 2: Select the DAST/API Tab
On the Integrations > Scanners page, click on the DAST/API tab.
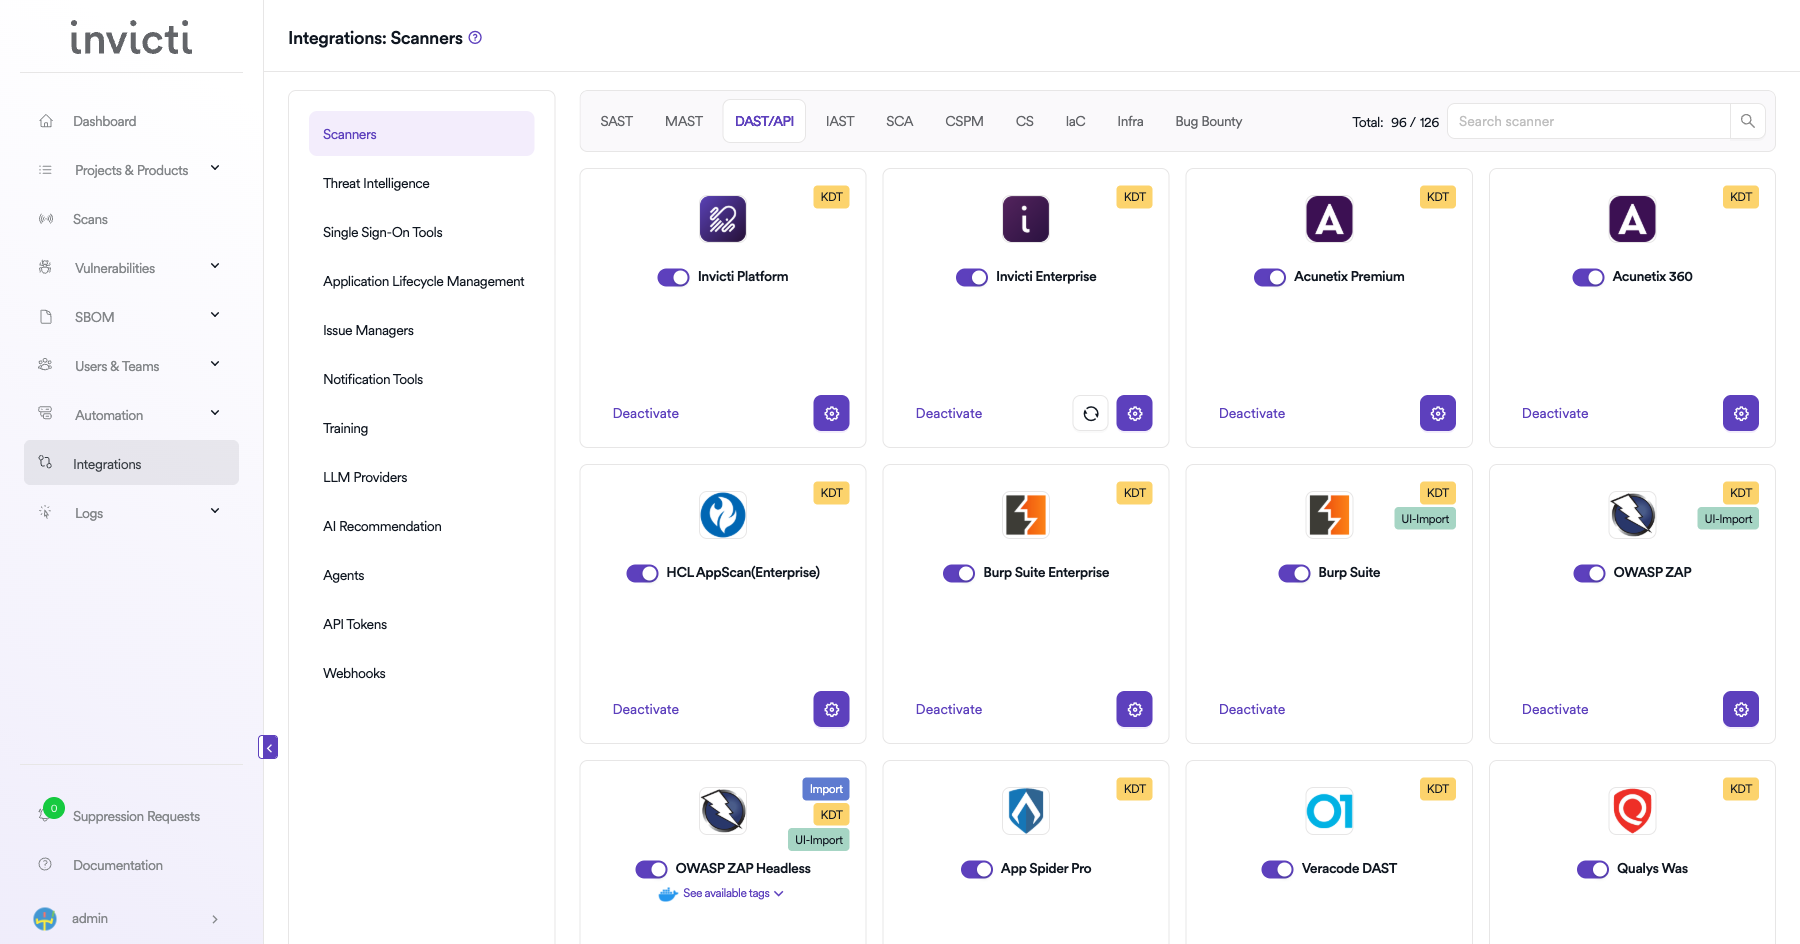
Step 3: Find and Activate Qualys WAS
Scroll through the list of DAST/API scanners to find Qualys WAS.
-
If Qualys WAS is not activated, you will see an "Activate" button. Click it to enable the integration.
Note: The scan method badge on the Qualys WAS card shows KDT, which means scans are triggered through the Kondukto CLI tool (KDT).
Step 4: Configure Connection Settings
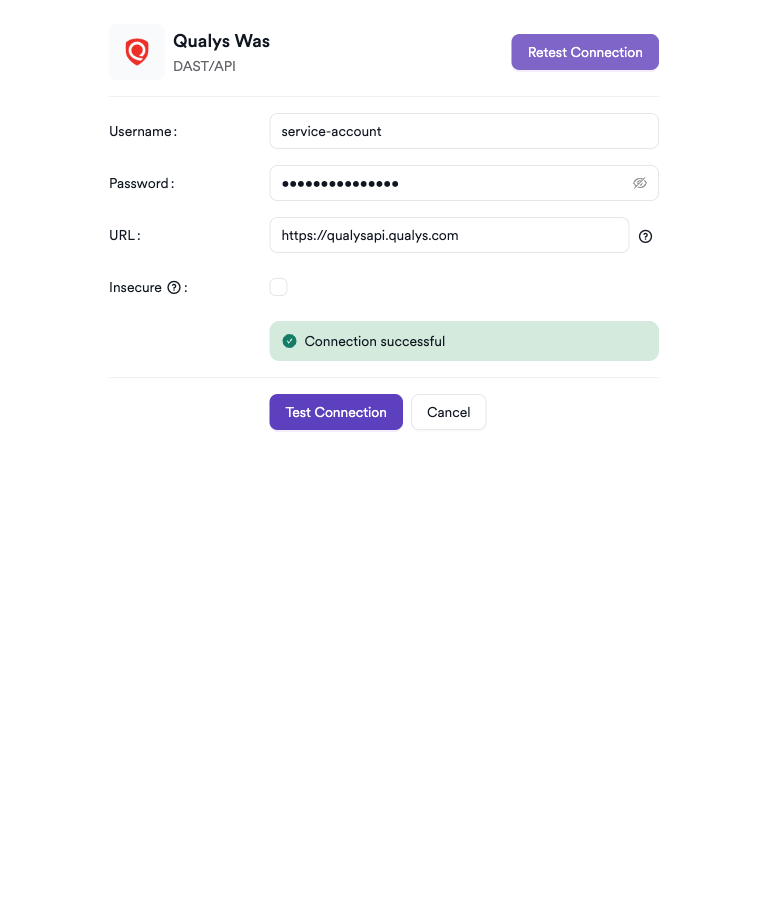
Click on the gear icon on the Qualys WAS card to open the configuration panel. Fill in the required fields:
-
Username: Enter your Qualys account username.
-
Password: Enter your Qualys account password.
-
URL: Enter your Qualys API gateway URL (e.g.,
https://qualysapi.qualys.com). -
Insecure: Enable this checkbox only if your Qualys instance uses a self-signed SSL certificate.
Step 5: Test the Connection
Click Test Connection. A green Connection successful message confirms the credentials and API URL are valid.
Summary
| Step | Action |
|---|---|
| 1 | Navigate to Integrations from the sidebar |
| 2 | Select the DAST/API tab |
| 3 | Activate Qualys WAS |
| 4 | Enter URL, Username, and Password |
| 5 | Test the connection |
How to Create a Scan
Navigate to Project Scanners
- Open a project in Invicti ASPM.
- Go to Settings > Scanners.
- Click Add Scanner.
Add Qualys WAS Scanner
- Select DAST/API as the scanner type.
- Choose Qualys WAS from the scanner list.
- Click Add to open the scan configuration drawer.
Scan Configuration Fields
| Field | Description | Required |
|---|---|---|
| Environment | Select the environment for the scan | No |
| Bind To | Existing Qualys WAS scan to bind to | Yes |
| Profiles | Option profile to use for the scan | No |
| Name | Name for the new scan | Yes |
| Branch | Source code branch associated with this scan | No |
| Meta Data | Additional metadata for the scan | No |
| Scan Tag | Tag to identify the scan | No |

Scheduler
Enable the Scheduler toggle to run scans on a recurring schedule.
Webhook (Optional)
Add a webhook URL to receive scan completion notifications.
KDT Command
kdt scan -p <project_name> -t qualyswas -b <branch_name>Troubleshooting
Connection Fails
| Issue | Resolution |
|---|---|
| Invalid credentials | Verify username and password; ensure the account is not locked |
| Wrong API URL | Use the platform identification page to find the correct API gateway URL for your region |
| WAS module not enabled | Contact Qualys support to enable the WAS module on your subscription |
| Network/firewall | Ensure outbound HTTPS access to the Qualys API gateway is permitted |
Scan Issues
| Issue | Resolution |
|---|---|
| No web applications listed | Ensure the service account has access to the target web application records in Qualys WAS |
| Scan not starting | Verify scan concurrency limits have not been reached in your Qualys subscription |
| Empty scan results | Confirm the scan completed in the Qualys WAS dashboard and the report is available |
| Authentication errors | Rotate the password and update the integration |
Best Practices
- Use a dedicated Qualys service account with WAS API access only.
- Find and confirm your correct Qualys API server URL using the Qualys platform identification page before configuring the integration.
- Rotate the password regularly and update the integration immediately.
- Pre-create and verify web application records in Qualys WAS before triggering scans.
- Use Discovery Scans to identify application inventory before running full Vulnerability Scans.
Limitations
- The Qualys API server URL is region-specific; using the wrong URL will result in authentication failures.
- Concurrent scan limits depend on your Qualys WAS subscription tier.
- Web application records must be pre-configured in Qualys WAS; they cannot be created from the Invicti ASPM integration.
- Password-based authentication is required; token-based authentication is not supported for this integration.
Updated 3 months ago