Prisma Cloud CSPM Integration
Palo Alto Networks Prisma Cloud is a cloud-native security platform that provides Cloud Security Posture Management (CSPM) by continuously monitoring cloud environments for misconfigurations, compliance violations, and security threats. Invicti AppSec integrates with Prisma Cloud as a connection-based CSPM scanner, pulling cloud security findings and policy alerts directly into the platform.
Prerequisites
| Requirement | Description |
|---|---|
| Access Key ID | A Prisma Cloud API access key ID with sufficient permissions to list cloud accounts and retrieve alerts |
| Secret Key | The corresponding secret key for the Prisma Cloud API access key |
| Prisma Cloud API URL | The API base URL for your Prisma Cloud tenant (region-specific, e.g., https://api.prismacloud.io) |
Get an Access Key (on Prisma Cloud Side)
Prisma Cloud uses access key pairs (Access Key ID + Secret Key) for API authentication rather than personal credentials.
- Log in to the Prisma Cloud console at your regional URL (e.g.,
https://app.prismacloud.iofor US,https://app.eu.prismacloud.iofor EU). - In the upper right corner, click your profile icon, then select My Profile.
- Navigate to the Access Keys tab.
- Click Add to create a new access key.
- Enter a descriptive name (e.g.,
invicti-integration) and optionally set an expiration date. - Click Create.
- Copy the Access Key ID and Secret Key immediately — the Secret Key is shown only once and cannot be retrieved again.
To find your regional API URL, log in to the Prisma Cloud console and navigate to Settings → Profile. Your API URL is displayed under API Endpoint (e.g.,
https://api2.prismacloud.io). Use this exact URL — no trailing slash or path.
Best practice: Create a dedicated access key for the Invicti AppSec integration using a service account with read-only access to cloud accounts and alerts. This isolates the integration from personal credentials and simplifies key rotation.
Step 1: Navigate to Integrations
From the left sidebar menu, click on Integrations.
Step 2: Select the CSPM Tab
On the Integrations page, click on the CSPM tab to view the Cloud Security Posture Management scanners.
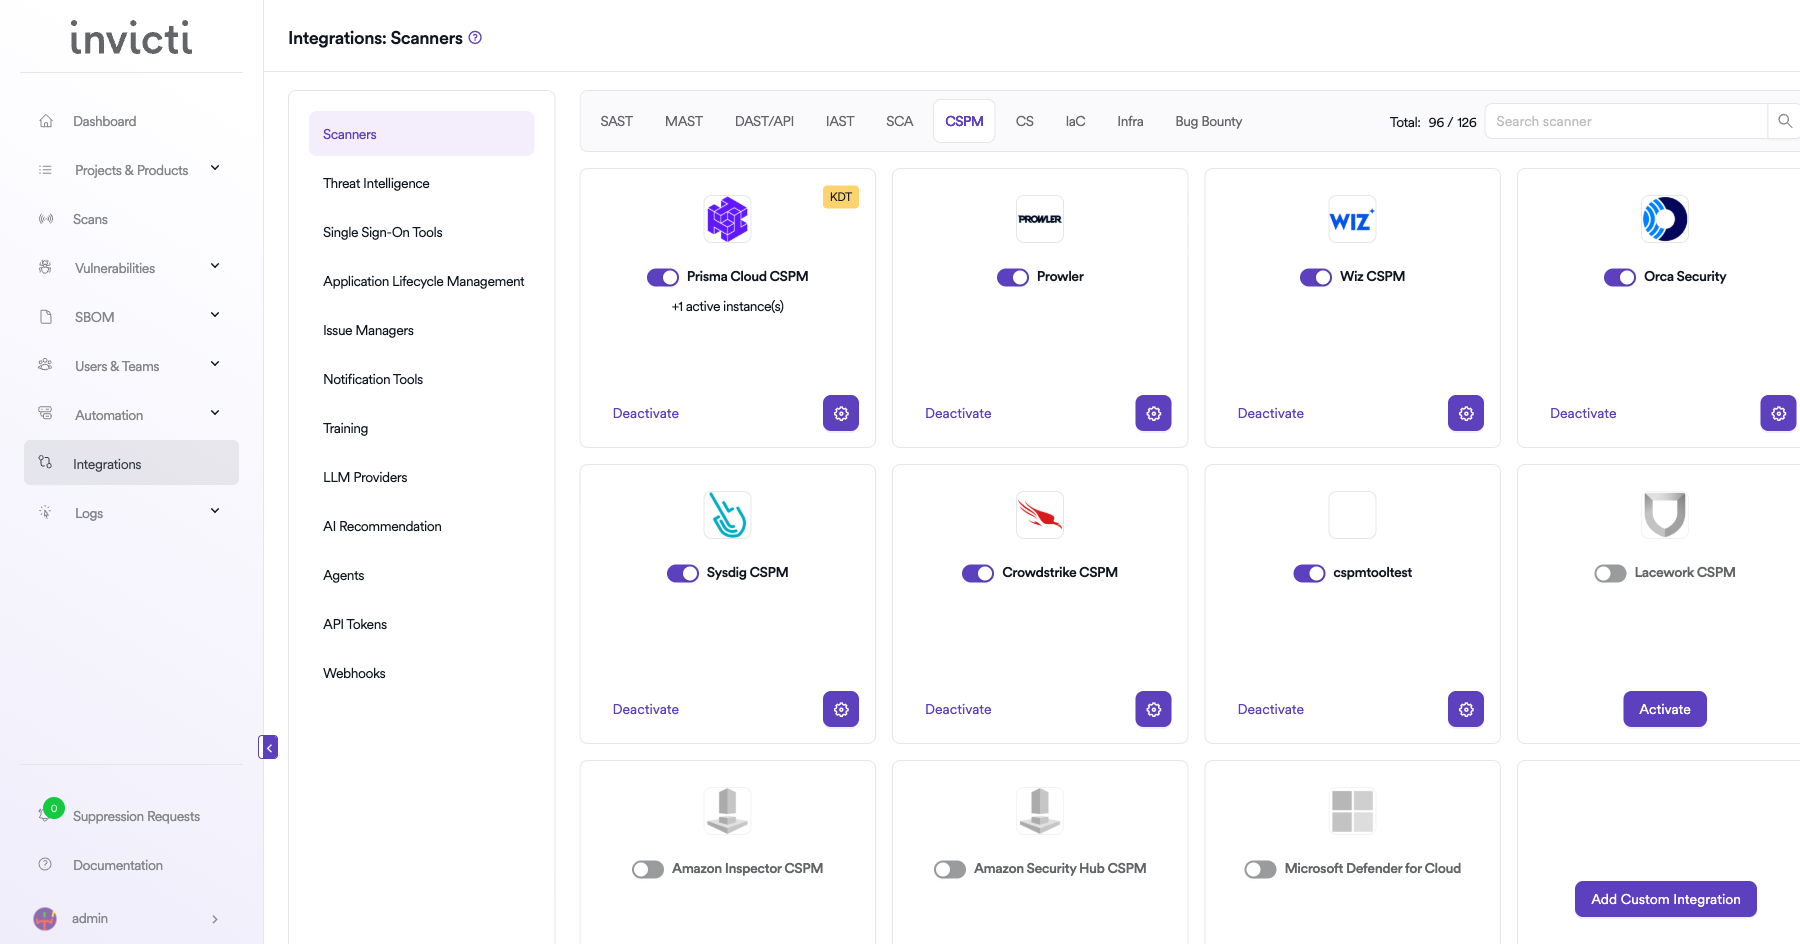
Step 3: Find and Activate Prisma Cloud CSPM
Locate the Prisma Cloud CSPM card in the CSPM scanners list and click the Activate button to open the configuration drawer.
If the integration is already active, click the gear icon (⚙️) to open the settings drawer and update the configuration.
Step 4: Configure Connection Settings
Fill in the following fields in the Prisma Cloud CSPM settings drawer:
| Field | Type | Required | Description |
|---|---|---|---|
| Access Key ID | Text input | Yes | The Prisma Cloud API access key ID used for authentication. |
| Secret Key | Password input | Yes | The secret key corresponding to the access key ID. Displayed as masked dots. |
| URL | Text input | Yes | The Prisma Cloud API base URL for your region. Must not include a trailing path. Example: https://api.prismacloud.io |
| Insecure | Checkbox | No | Disables SSL/TLS certificate verification. Enable only if your environment requires it. Not recommended for production. |
The URL must be the API base URL — not the console login URL. For example, use
https://api.prismacloud.io, nothttps://app.prismacloud.io. You can find your API URL in Prisma Cloud → Settings → Profile → API Endpoint.
Step 5: Test the Connection
After entering all required fields, click Test Connection.
- If the credentials and URL are correct, a green "Connection successful" message will appear.
- If the connection fails, verify your Access Key ID, Secret Key, and API URL. See the Troubleshooting section below.
Step 6: Save Settings
After a successful test connection, click Save to activate the integration.
The Prisma Cloud CSPM card on the CSPM integrations page will display an active status, confirming the integration is running.
Summary
| Step | Action |
|---|---|
| 1 | Navigate to Integrations from the left sidebar |
| 2 | Click the CSPM tab |
| 3 | Locate the Prisma Cloud CSPM card and click Activate |
| 4 | Enter Access Key ID, Secret Key, and URL |
| 5 | (Optional) Enable Insecure if required by your environment |
| 6 | Click Test Connection and verify the green "Connection successful" message |
| 7 | Click Save to activate the integration |
Create a Scan
Once the Prisma Cloud CSPM integration is active, you can bind it to a project to run scans.
Navigate to Project Scanners
- Open the project you want to configure.
- Go to Settings → Scanners within the project.
- Click Add Scanner.
- Select CSPM as the scanner type.
- Select Prisma Cloud CSPM from the scanner list.
- Click Add to open the scan configuration drawer.
Scan Configuration Fields
| Field | Type | Required | Description |
|---|---|---|---|
| Instance | Dropdown | Yes | Select the configured Prisma Cloud instance to use for this scan. |
| Cloud Account | Auto-complete | Yes | The Prisma Cloud cloud account ID to scan. Fetched from your Prisma Cloud tenant. |
| Branch | Auto-complete | Yes | The source repository branch to associate with this scan. |
| Environment | Dropdown | No | Select the environment for this scan (e.g., feature, release). Defaults to none. |
| Metadata | Text input | No | Optional metadata string for the scan. Used for filtering and reporting. |
| Scan Tag | Text input | No | Optional tag to organize and group related scans. |
| Fork Default Branch | Toggle | No | When enabled, Invicti forks from the project default branch before scanning. |
KDT Command
Once the scan is configured, you can also trigger it via the KDT CLI:
kdt scan -p <project_name> -t prismacloudcspm -b <branch_name>Troubleshooting
Connection Fails
| Problem | Possible Cause | Solution |
|---|---|---|
| "Connection failed" on Test Connection | Invalid Access Key ID or Secret Key | Verify that the access key is active and not expired. Regenerate if necessary from Prisma Cloud → My Profile → Access Keys. |
| "Connection failed" — URL error | Wrong API URL or region mismatch | Confirm the API URL matches your Prisma Cloud tenant's region. Find it in Prisma Cloud → Settings → Profile → API Endpoint. Do not use the console login URL (app.prismacloud.io). |
| SSL/TLS certificate error | Self-signed or untrusted certificate in your environment | Enable the Insecure checkbox. Not recommended for production. |
| Network error / cannot reach server | Firewall or proxy blocking outbound HTTPS | Verify that Invicti AppSec can reach the Prisma Cloud API URL over HTTPS on port 443. Check firewall rules and proxy settings. |
Scan Issues
| Problem | Possible Cause | Solution |
|---|---|---|
| No cloud accounts in the dropdown | Access key lacks permission to list accounts | Ensure the Prisma Cloud access key account has the Account Group Read Only role or higher assigned in Prisma Cloud → Settings → Roles. |
| Scan starts but returns no findings | No open alerts for the selected account | Verify that the selected cloud account has active policy alerts in Prisma Cloud. Check that the account is actively monitored and not in a suppressed state. |
| Scan reports empty results after retries | Prisma Cloud API returned no alerts on first fetch | Invicti retries up to 3 times if results are initially empty. If consistently empty, check that the cloud account has been onboarded and scanned in Prisma Cloud. |
| Cloud account ID not recognized | Account was removed or renamed in Prisma Cloud | Re-open the scan configuration drawer and reselect the cloud account from the updated list. |
Best Practices
-
Use a dedicated service account: Create a Prisma Cloud service account specifically for the Invicti AppSec integration with the minimum required permissions (Account Group Read Only). Avoid using personal admin credentials.
-
Rotate access keys regularly: Set an expiration date on the access key (e.g., 90 or 180 days) when creating it in Prisma Cloud. Update the key in Invicti AppSec settings before it expires to avoid scan interruptions.
-
Match API URL to your tenant region: Always use the exact API URL shown in Prisma Cloud → Settings → Profile → API Endpoint. Using the wrong regional URL will result in authentication failures even with valid credentials.
-
Use HTTPS: Ensure the Prisma Cloud API URL uses HTTPS. Avoid enabling the Insecure option in production environments.
-
Bind one cloud account per project: Configure each Invicti AppSec project to scan a specific Prisma Cloud cloud account. Scanning multiple accounts under a single project makes it harder to triage and prioritize findings.
Limitations
-
Cloud account access is determined by Prisma Cloud roles: The set of cloud accounts available for scanning depends on the account groups assigned to the access key's role in Prisma Cloud. Accounts not visible to the role will not appear in the dropdown.
-
Alert-based findings only: Invicti AppSec pulls data from the Prisma Cloud
/v2/alertendpoint withalert.status=open. Only alerts that are currently open in Prisma Cloud are imported — suppressed, resolved, or dismissed alerts are excluded. -
Pagination limit of 5,000 alerts per scan: Each scan retrieves up to 5,000 open alerts per page and paginates automatically. Very large cloud environments with tens of thousands of alerts may take longer to process.
-
Prisma Cloud SaaS only: This integration connects to the Prisma Cloud SaaS platform via its public API. Self-hosted or air-gapped Prisma Cloud deployments are not supported unless the API endpoint is network-accessible from Invicti AppSec.
Updated 3 months ago